|
Main Menu
|
|
|
|
My 2007 4Runner
|
|
|
|
4Runner History
|
|
|
|
Other
|
|
|
|
|
Concept.
This page describes the specific details behind changing my Toyota 4Runner's exterior Reverse Back-Up lights from standard automotive incandescent
light bulbs to Led (light emitting diode) type lighting. This was done in order to both increase brightness and change the color of the warm yellowish
factory incandescent filament bulbs to a whiter, cooler color range.
Reverse Back-Up lights:
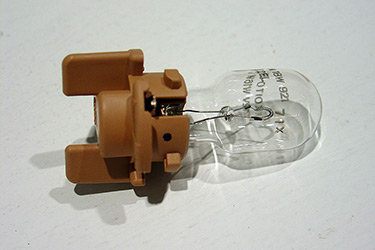
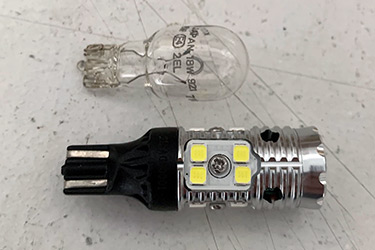
Factory Bulb: 921
Factory Wattage: 18.0 watts
Factory Amperage: 1,386 milliamps
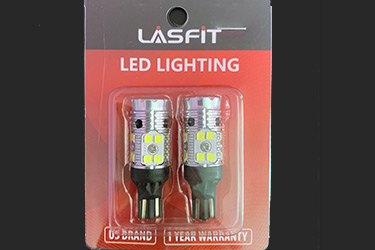
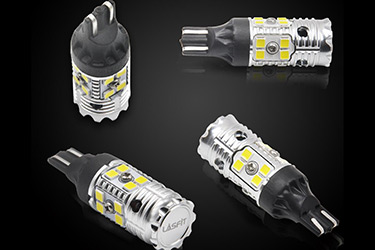
Led Replacement Bulb: LasFit T-T15 CANBUS Error Free White LED Reverse Back Up Light Bulb Upgraded Version
Part no.: T-T15
Led Type: 16 pcs 3030SMD Led Chips
Advertised Kelvin color rating: 6,000k White
Advertised Wattage: 13.0 watts
Recommended forward DC Voltage operating range: 11.5-14.5 volts
Actual metered Amperage: 1,069 milliamps
Actual calculated Wattage at 12.5V (W=V*(MA/1000)): 13.4 watts
Approximate Luminous Flux: 1,500 Lumens each
Comments:
LasFit T series T15/921 LED bulbs are LasFit's newest version bulbs with integrated CANBUS support system.
This is LasFit's top of the line Led bulb in the 921 / T15 size.
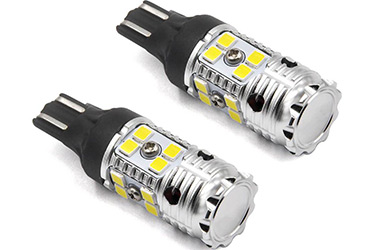
Each bulb uses sixteen (16) 3030 SMD (Surface Mount Diode) Led Chips mounted in a 360 degree radial firing pattern that total 13 watts of power,
outputting 1,500 lumens at a 6000K color temperature for a pure clean white light.
When lit, this radial firing design perfectly fills out the chrome reflector backup lamp housing on the 4th Gen Toyota 4Runner.
All the leds are mounted on aluminum body to provide superior cooling and protection.
Safety Protection is provided via built in MINI fuses to protect the bulbs and your vehicle against instantaneous high current providing
for a safer installation and usage.
LasFit Led #921 13.0W Bulb |

LasFit Led #921 13.0W Bulb |
LasFit Led #921 13.0W Bulb |
Factory Incandescent #921 Bulb |
Factory Incandescent #921 Bulb
Led #921 13.0W Bulb |
LasFit Led #921 13.0W Bulb |
Bench
Testing.
I will detail what have learned about the Led bulb specifications. I feel that it is
important to be informed of and understand this info in order make the right choice for a particular application. You will find that
there are a vast array of 12V Led replacement automotive light bulbs on the market from a wide variety of companies. For any given
automotive bulb there can be hundreds of different Led replacements from a wide varitey of companies,
in various color ranges, running at various power levels, providing vastly different light output, and of course at various price points.
Unfortunately not many retailers make these specs available or provide consistent information on their websites. In fact upon contacting a
few of the companies myself, they simply either don't know, don't care to find out, or don't want to share that type of info. This makes
it hard to comparison shop amongst various competing products. Specs such as "high power", "HID color", "cool white", "super bright", zenon, etc.,
are meaningless without tested numbers to substantiate claims. As with any product, you have to take the manufacturers or retailers advertised
information with a grain of salt, do your own research beforehand, and follow it up with independent testing.
While I am unable to test the Color Temperature or Luminous Flux ratings due to not having access to that type of testing equipment,
I can confirm the advertised Watts (power) and Amps (current draw). To do this one can use a simple electrical multimeter which can test
the current draw and supply voltages. Multimeters cannot calculate wattage, but you can back into the number by multiplying the
supply voltage by the amperage draw of the electrical load.
Before we discuss how to do this testing, let's discuss why. My goal is to add high power Led lights to various areas of my vehicle
utilizing the existing factory light circuits.
As long as we don't exceed the factory amperage draw for a circuit, additional relays and fuses will not be necessary
and things will still be completely safe.
To measure the DC supply voltage of the vehicle's battery, set the meter to volts, and connect the electrical multimeter in
parallel with the battery.
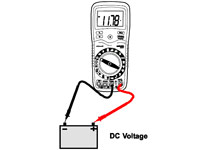
Measuring DC voltage |
Measuring battery voltage
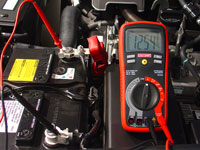
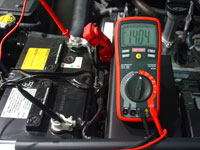
Vehicle off |
Measuring battery voltage
Vehicle on |
To measure the DC current draw of an electrical load such as an automotive light bulb whether it be incandescent or Led, connect the
multimeter, operating as an ammeter in this case, in series (in-line) with the circuit so that all electrons flowing through the circuit
have to go through the meter.
When a multimeter is placed in ammeter mode, it acts like a simple length of wire, with very little resistance from one test probe to
the other. Consequently, an ammeter will act as a short circuit if placed in parallel (across the terminals of) a substantial source
of voltage such as the vehicle's battery. So be very sure to switch the mode from amps back to volts before connecting it in line
(parallel) with the battery as if you don't you will create a short circuit. Hopefully your meter has a fuse, which will blow in that
situation. If your meter does not have a fuse you will either damage your meter or your vehicle's electrical system.
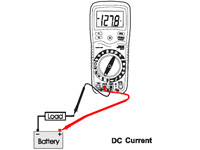
Measuring DC current |
Measuring current draw (amperage)
of the factory dome light
|
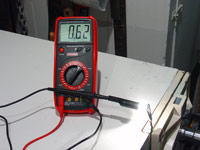
Referencing the pics above, let's go thru a basic example checking the wattage of the factory festoon 31mm dome lights (DE3175)
which are known to be rated at 8.0 watts. The wattage of any bulb can be calculated by taking the supply voltage (V=12.5)
multiplying that by the current draw or amperage (A=0.62) which gives a wattage of W=7.8 watts which is right about on target.
The meter being used in these tests is a Craftsman #82334
Autoranging, 11 Function Digital Multimeter. It is accurate to 0.5% when reading DC voltage and 1.5% to 2.5% when reading DC current.
The two pics below are the results of testing both the factory incandescent 921 reverse bulbs and
the LasFit T-T15 CANBUS Error Free White LED Reverse Back Up Light Bulbs.
You will find that the factory bulbs 1.386 amp draw at 12.5 volts equates to a 17.3 wattage, which is quite close to the factory's rating of 18.0 watts.
You will also, impressively I might add, find that the LasFit Led bulb showed a 1.069 amp draw at 12.5 volts for a 13.4 volt wattage which is spot on to the manufacturers claim.
Most Led manufacturers overstate their watts for a more impressive but misleading number. Nice to see that the LasFit's are living up to their claim.
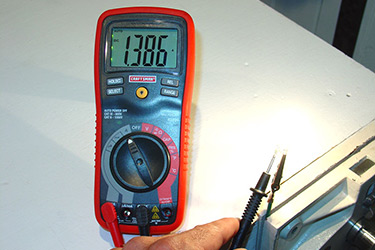
Incandescent #921 amperage
1,386 milliamps |
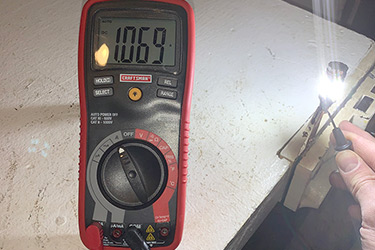
LasFit Led #921 amperage
1,069 milliamps |
Installation:
Installation was 100% plug-and-play and completed very quickly, literally in a minute.
A true direct fit with zero modification to the 4Runner.
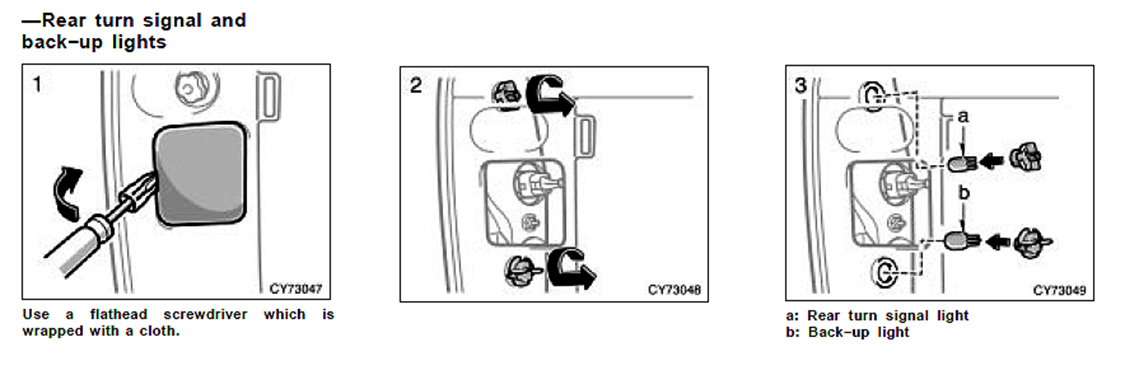
Using a flat head screwdriver, pry open the covers on either side of the interior cargo area.
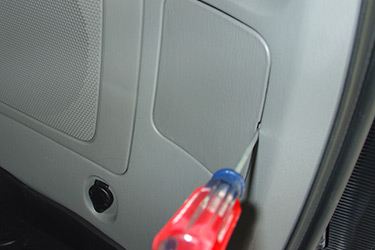
The reverse back-up bulb is the bottom most of the three vertically mounted bulbs.
The bulb is disconnected with a quarter turn in a counterclockwise direction, then pull it straight out of the housing.
The bulb itself is removed from the bulb holder just by pulling straight out. The led bulb gets installed in the same manner.
Leds, as well as all diodes, are polarity sensitive.
This means that the positive and negative terminals must be connected correctly for it to operate properly.
If you find that upon installation they do not light up, simply reverse the installation orientation (polarity) of the bulb.
Reverse Bulb Installation |
Back-Up Reverse light removal |
Back-Up Reverse light installed |
Results:
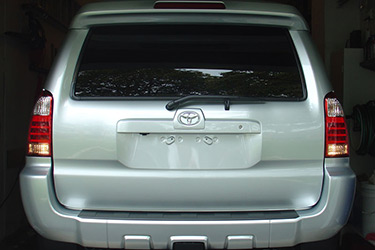
As you can see by the pics below, these leds are significantly brighter than the factory 18 watt incandescent 921 bulbs.
When lit, they look great with a crisp pure white color, even considering that my stock 4th generation 4Runner Sport backup reverse lenses are lightly smoked.
I have had other Led reverse bulbs which were a big improvement over factory stock in both color and usable light.
But these by far are the brightest reverse bulbs i have used to date. In fact these LasFit bulbs have 6 times the luminous flux rating (1500 lm) than the Leds they replaced (250 lm).
Incandescent in Daytime |
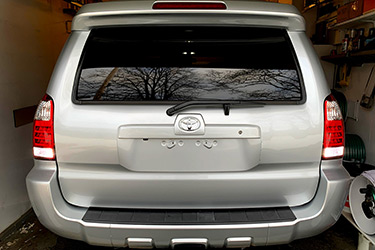
Led in Daytime |
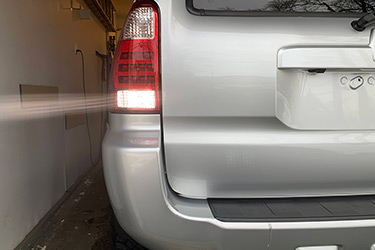
Led |
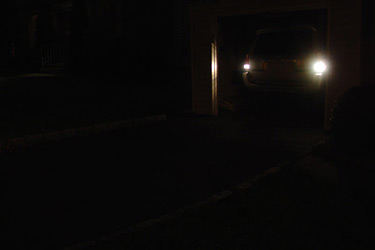
Incandescent at Night |
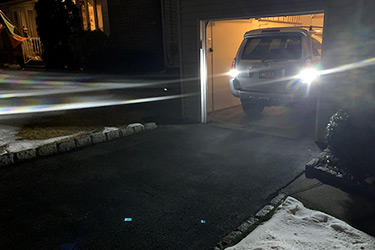
Led at Night |
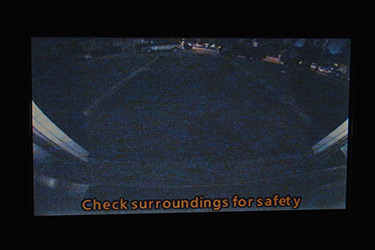
Back up camera
Incandescent |
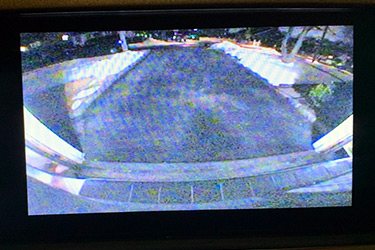
Back up camera
Led |
|
|