Concept:
The 4Runner Scheduled Maintenance Guide says to Inspect the Transmission Fluid every 30,000 miles and only in
Special Operating Conditions such as Driving While Towing, to replace the fluid every 60,000 miles.
Personally I perform a drain and fill of the Transmission Fluid somewhere between 30,000 to 50,000 mile intervals.
Performing a drain and fill transmission fluid change is often recommended over a complete flush, especially for transmissions that use Toyota's WS (World Standard) fluid.
Here are some benefits:
1. Less Disruptive to the System: A drain and fill is less aggressive than a flush and reduces the risk of dislodging debris or causing damage to the transmission components.
This is true because you are only changing out approximately 1/4 of the total system capacity at any one given time.
2. Cost-Effective: A drain and fill is usually less expensive than a flush, as it requires less fluid and time.
3. Maintains Transmission Health: Regular fluid changes help maintain proper lubrication and cooling, as well as refreshing the fluid additive package, which can extend the life of your transmission.
4. Easier DIY Maintenance: A drain and fill is simple to do at home with basic tools, making it a more accessible option for DIY enthusiasts.
5. Prevents Fluid Contamination: Regular drain and fills can help prevent fluid breakdown and contamination, which can lead to transmission issues over time.
It is NOT recommended to change the fluid on high mileage vehicles that never have had their transmission fluid changed.
However, this idea is somewhat controversial and debated among automotive experts.
Here are some reasons for not changing the fluid for the first time on vehicles with higher mileage:
1. Risk of Dislodging Debris: Over time, transmission fluid can break down and accumulate debris, which may settle in various parts of the transmission. The concern is that when you introduce fresh fluid, it might dislodge this accumulated debris, potentially causing blockages or other issues within the transmission.
2. Adaptation to Worn Components: In some cases, the transmission fluid might have compensated for wear in the transmission components. Introducing fresh fluid could potentially expose these worn parts, leading to increased slipping or other problems.
3. Seal Swelling: Old transmission fluid might have caused seals to swell slightly, effectively compensating for wear and preventing leaks. Introducing fresh fluid could potentially cause these seals to shrink back to their original size, leading to leaks.
Gaskets Needed:
Toyota specifies that the following drain and overflow plug gaskets are a non-reuseable part.
These gaskets are made of metal and deform when torqued down to form a proper seal. Always place the flat side towards the drain plug.
Please note, the fill plug gasket is a rubber o-ring and just requires inspection and replacement only if worn or damaged.
| Part Name |
Part Number |
Torque
Specification |
Wrench
Size |
| Transmission Drain Plug Gasket |
35178-30010 |
15 Ft-Lb |
14mm socket |
| Transmission Overflow Plug Gasket |
35178-30010 |
15 Ft-Lb |
5mm hex |
| Transmission Fill Plug Rubber O-Ring Gasket |
90301-15004 |
29 Ft-Lb |
24mm socket |
Transmission Fluid:
For this drain and fill process I used 4 quarts of the Original Equipment Manufacturer (OEM)
Toyota Transmission Fluid ATF-WS (World Standard) 00289-ATFWS.
Toyota recommends their World Standard (WS) Automatic Transmission Fluid (ATF) which was introduced in 2004 to reduce
maintenance costs and increase the mileage between scheduled maintenance checks.
It is a proprietary blended synthetic fluid and Toyota has not approved other ATF's as substitutes for WS.
Therefore it is important, especially when doing a Drain and Fill only, to continue to use Toyota WS fluid for best compatability with the fluid remaining in the transmission.
Toyota Technical Service Bulletin (TSB) TSB TC010-07 issued on June 28, 2007 states the following:
The use of Genuine Toyota ATF-WS is recommended.
100,000 Maintenance Interval — Inspection only; ATF-WS does NOT require any flushing or changing during the life of the vehicle.
The use of additives or aftermarket fluids that are considered compatible or substitutes may result in shift concerns and damage to the internal transmission components.
ATF-WS is NOT compatible with T-IV or Dexron ATF.
Containers storing Toyota ATF-WS should always be sealed — If exposed to the atmosphere, ATF-WS may absorb moisture and potentially cause shift concerns if used in operation.
When performing repairs on ATF-WS equipped transaxles, it is important to use only new, clean ATF–WS when refilling the ATM.
ATF-WS equipped ATMs may use the overflow type procedure — Any fluid drained from the overflow plug should be discarded following proper local regulations and never reused. Failure to do so could result in shift concerns and damage to the internal transmission components.
Fluid Specs:
Here are the Automatic Transmission fluid specifications as per the Toyota 4Runner owners manual.
Fluid Capacity Drain and Fill: 3.2 quarts
Fluid Type: Toyota Genuine ATF WS
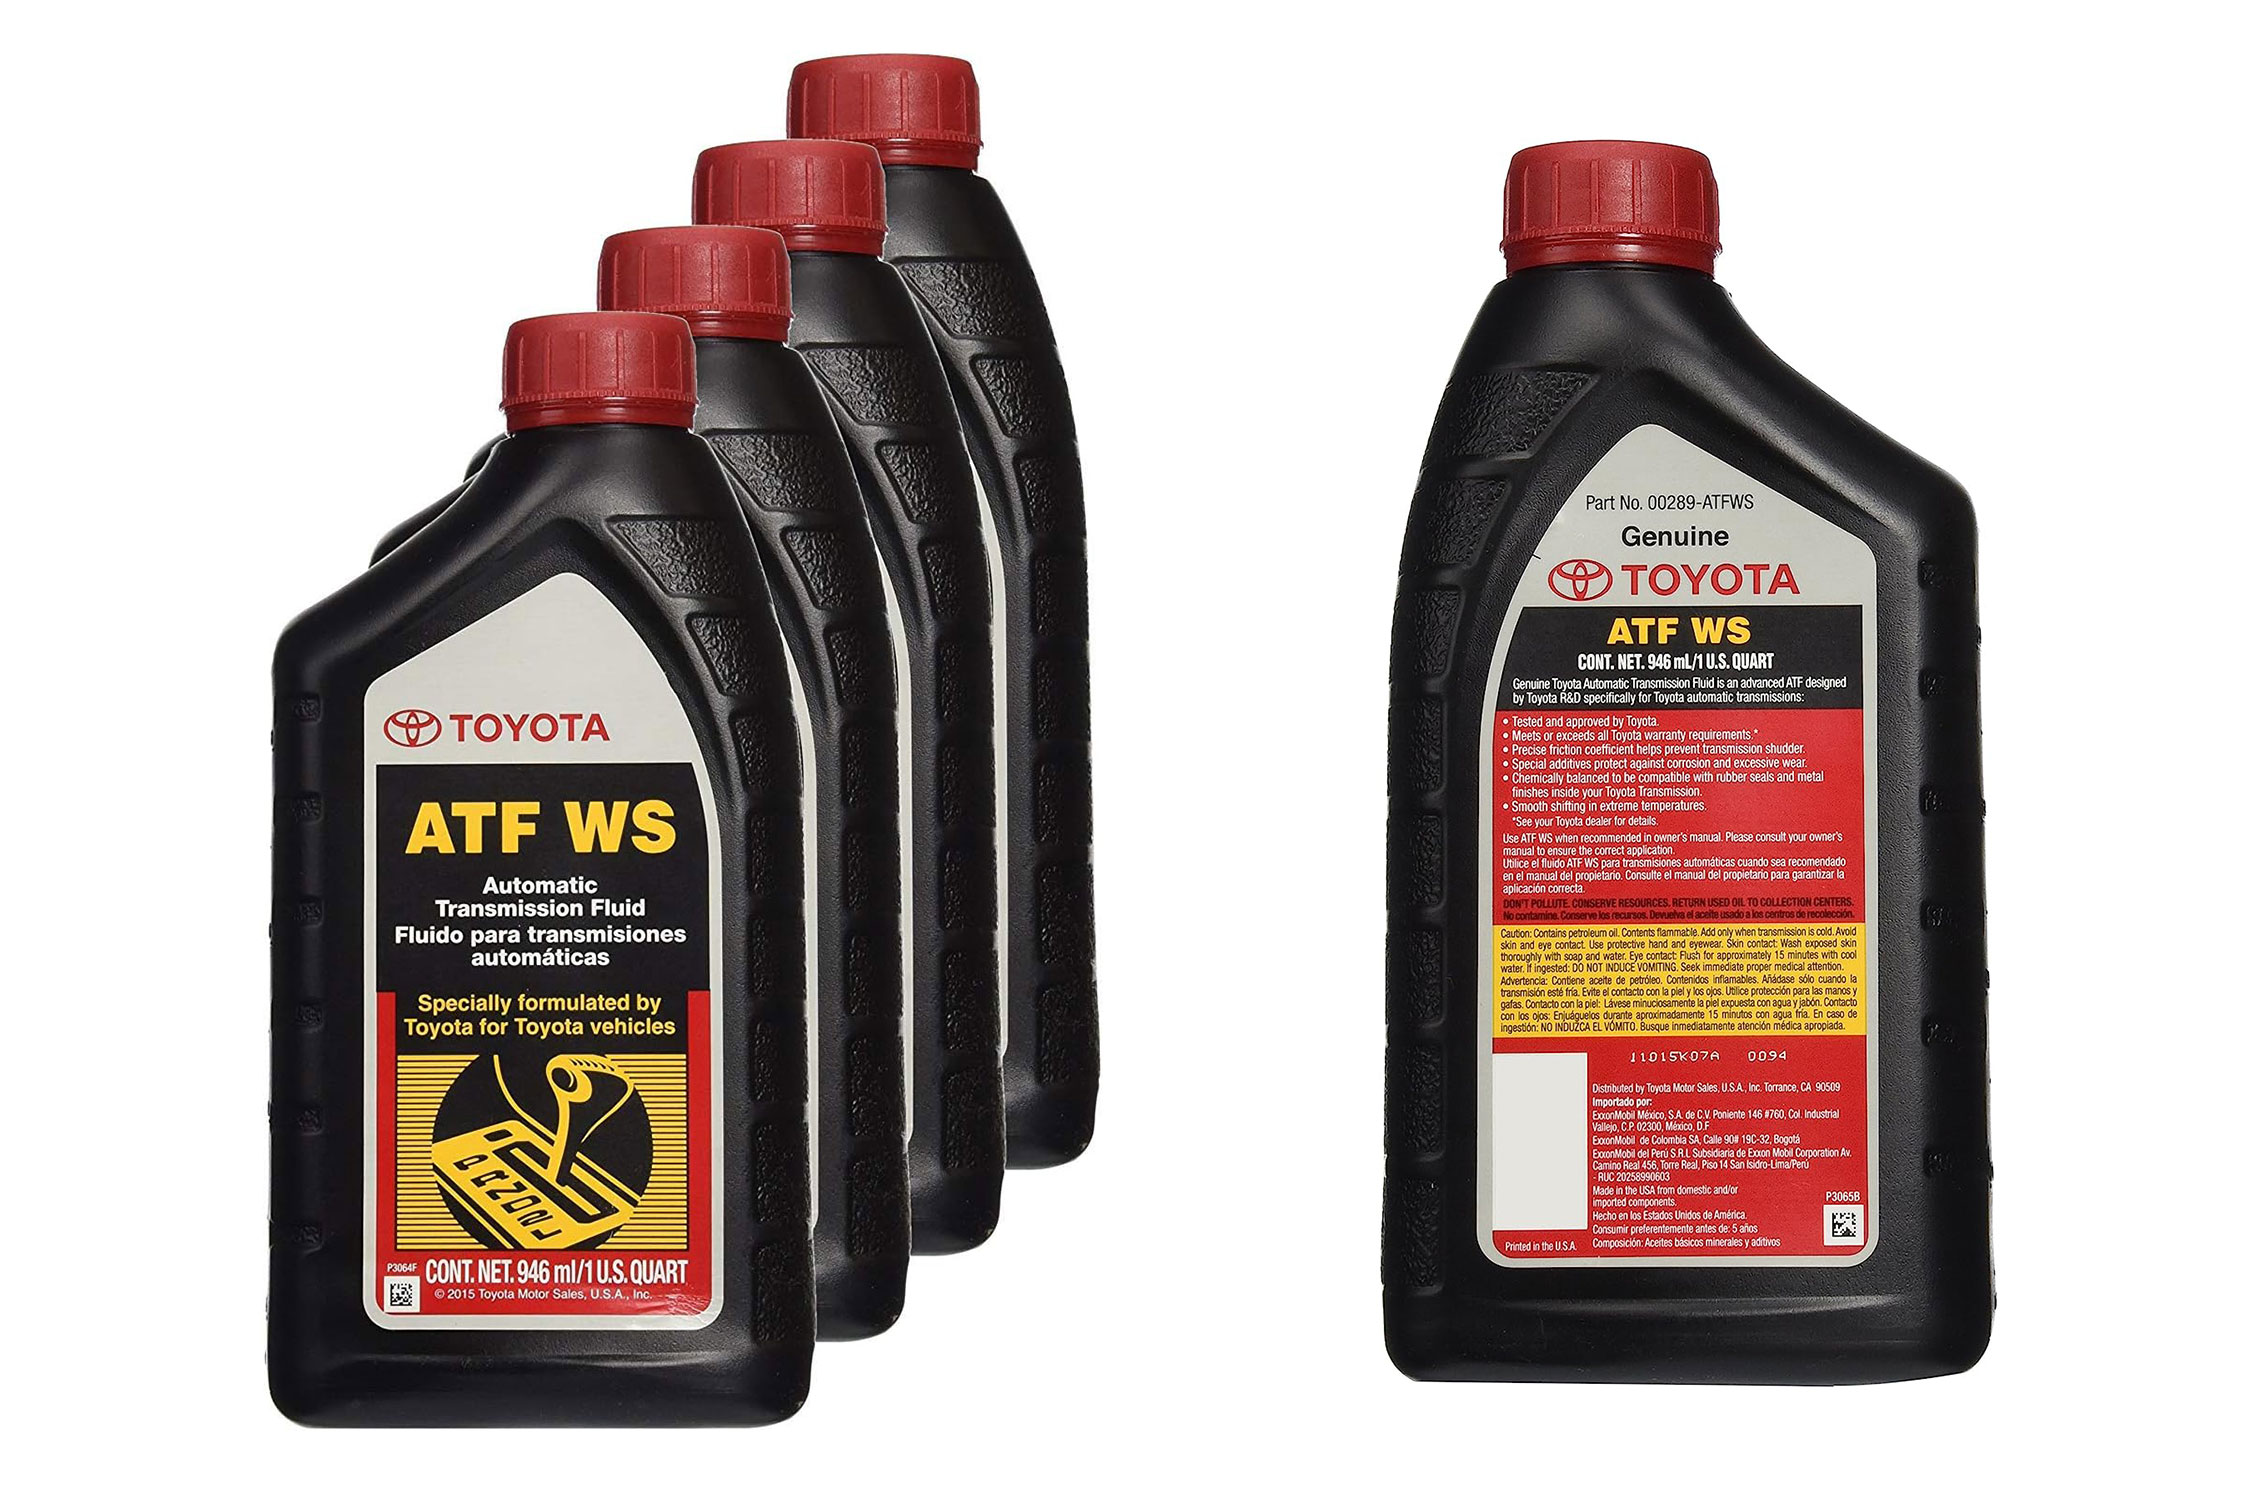
Toyota Genuine ATF WS |
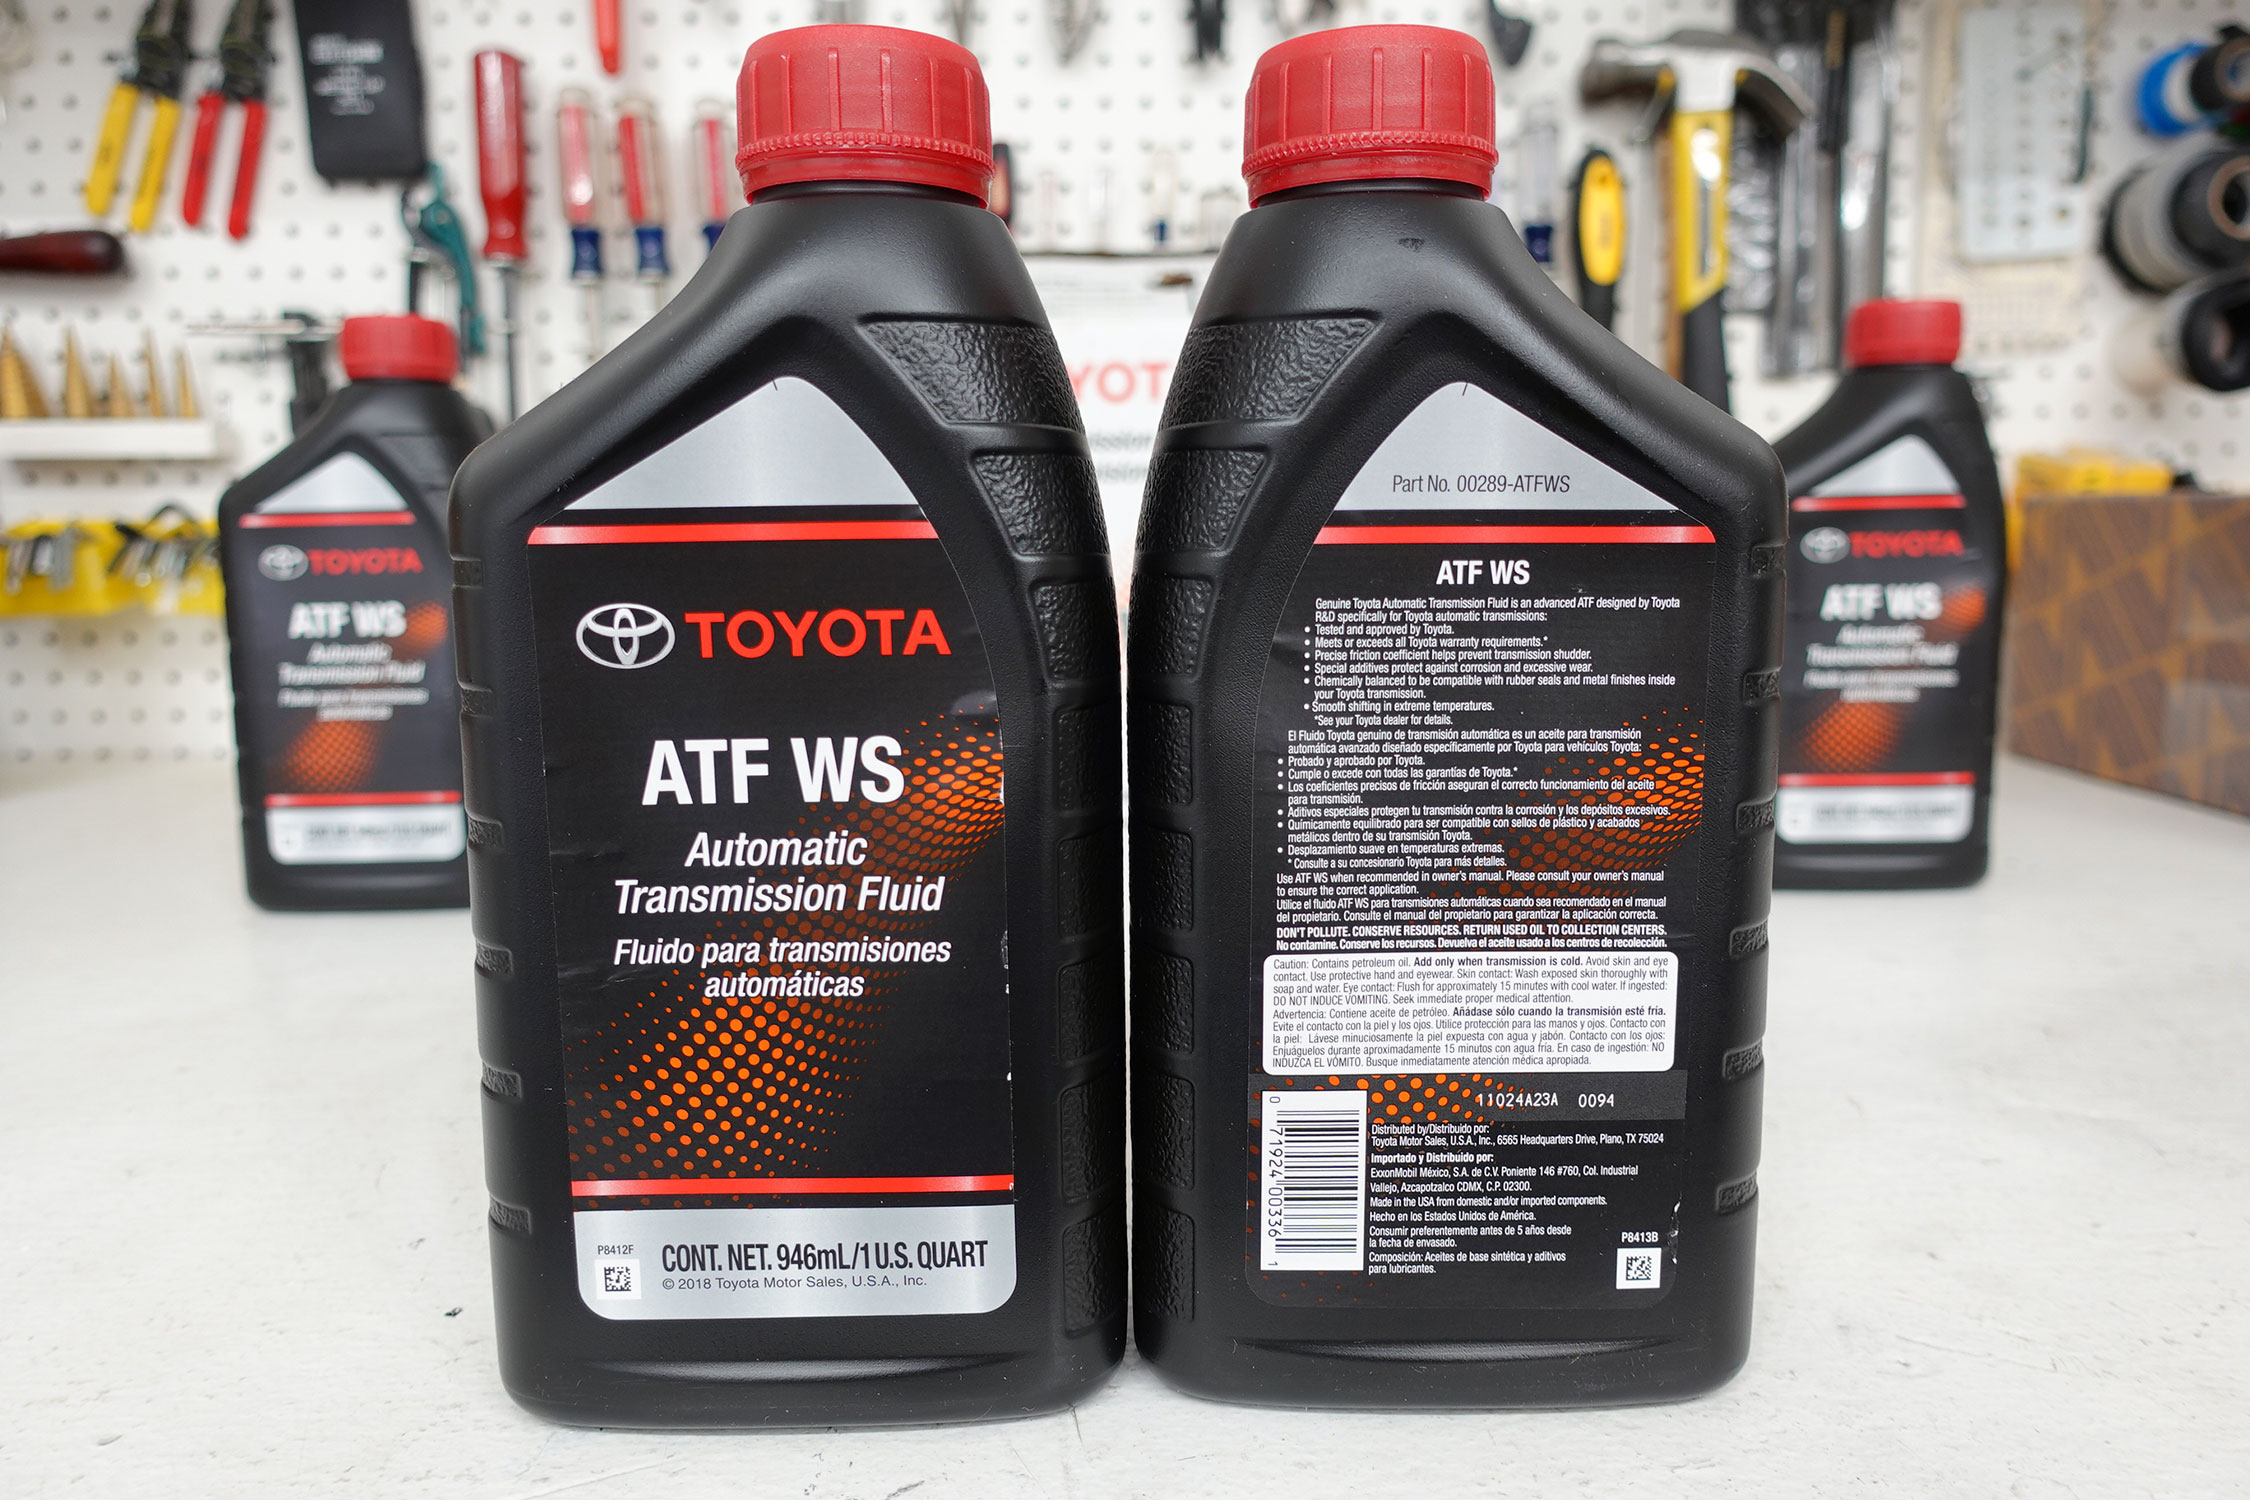
Toyota Genuine ATF WS |
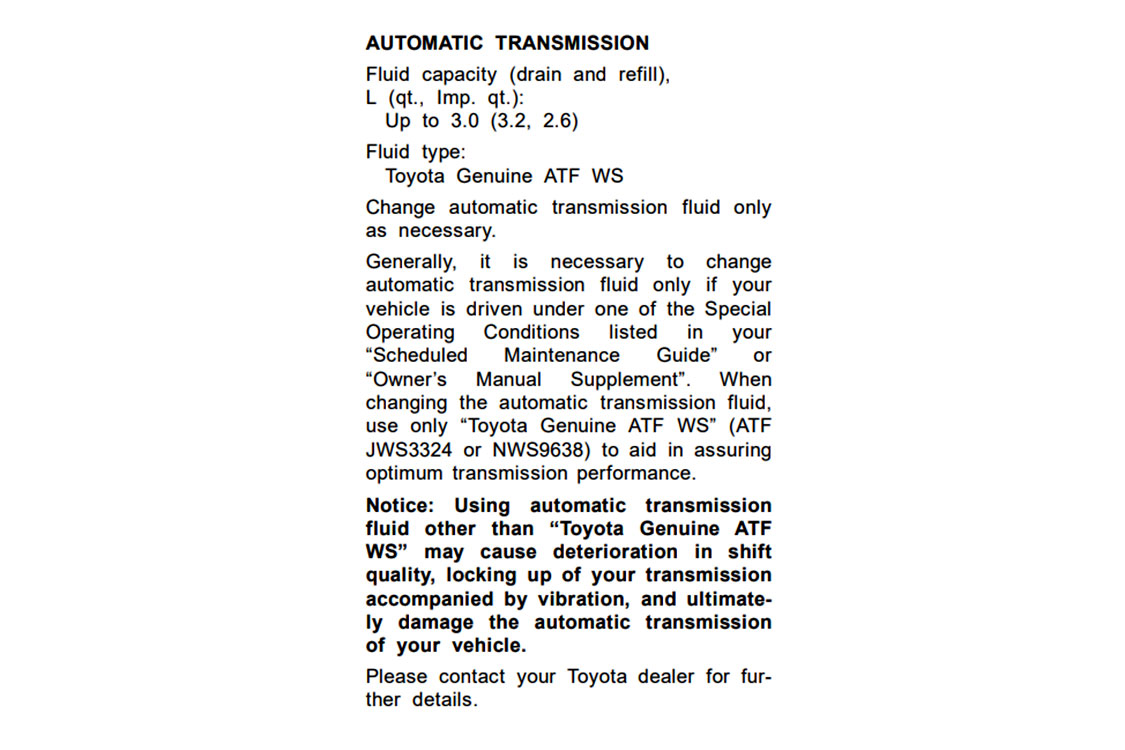
Toyota 4Runner owners manual page |
Automatic Transmission Drain and Fill Process:
Always remove the fill bolt first as you want to ensure you can re-fill before draining then finding out you cannot get the fill bolt out.
The fill plug is located on the passenger side of the transmission.
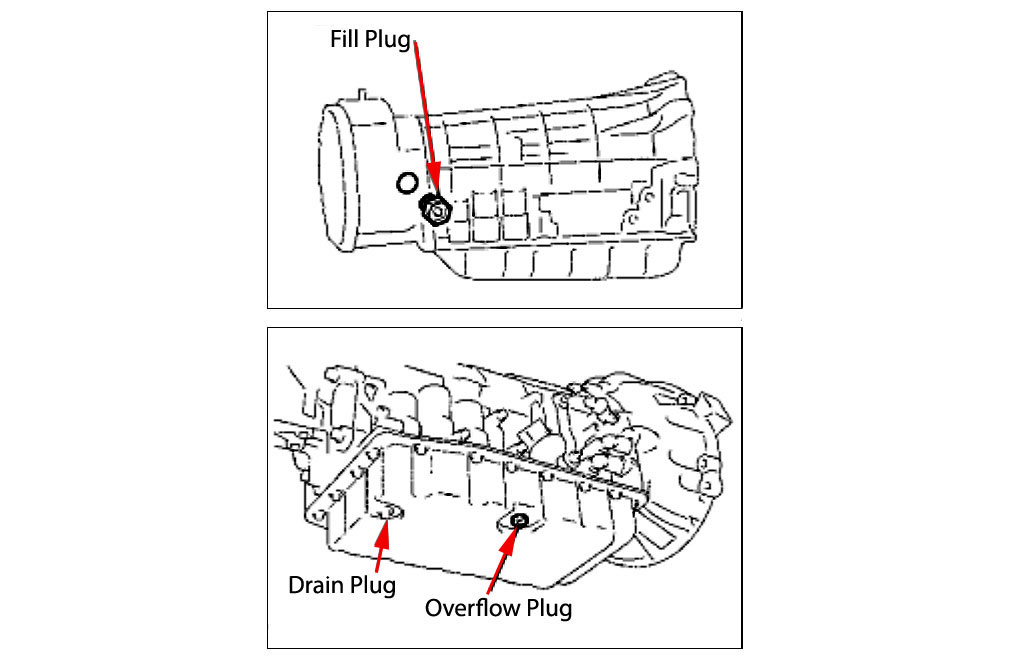
Fill, Drain, Overflow Plug locations |
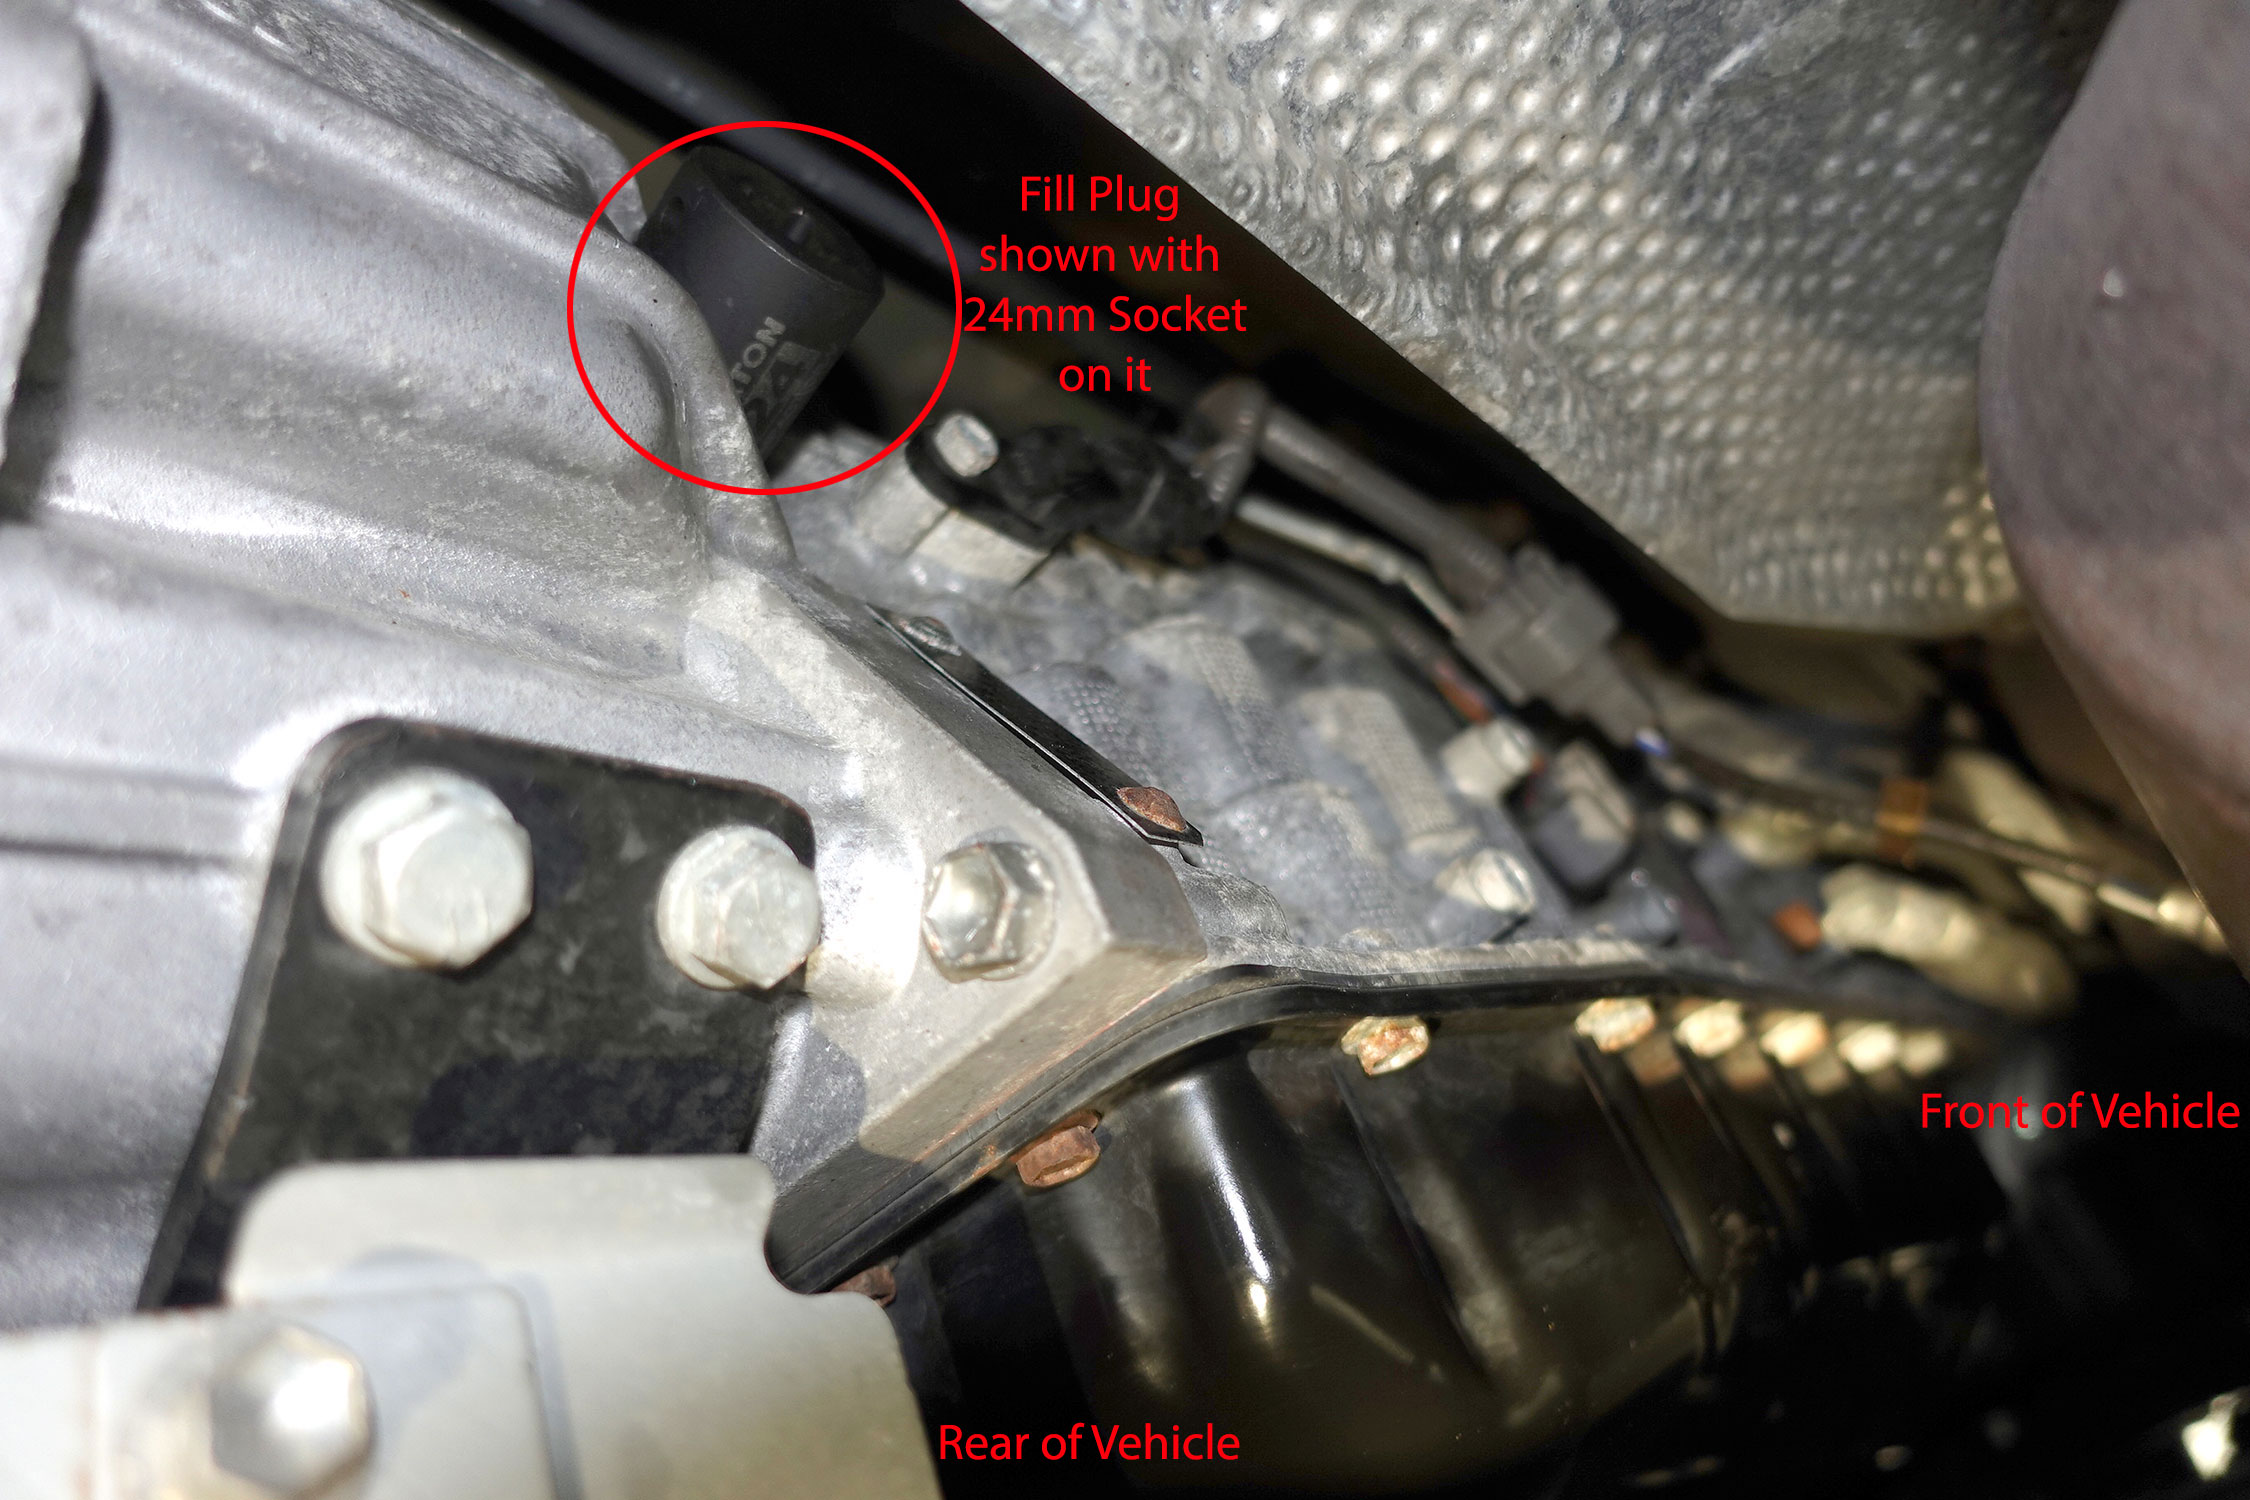
Transmission Fill Plug Location |
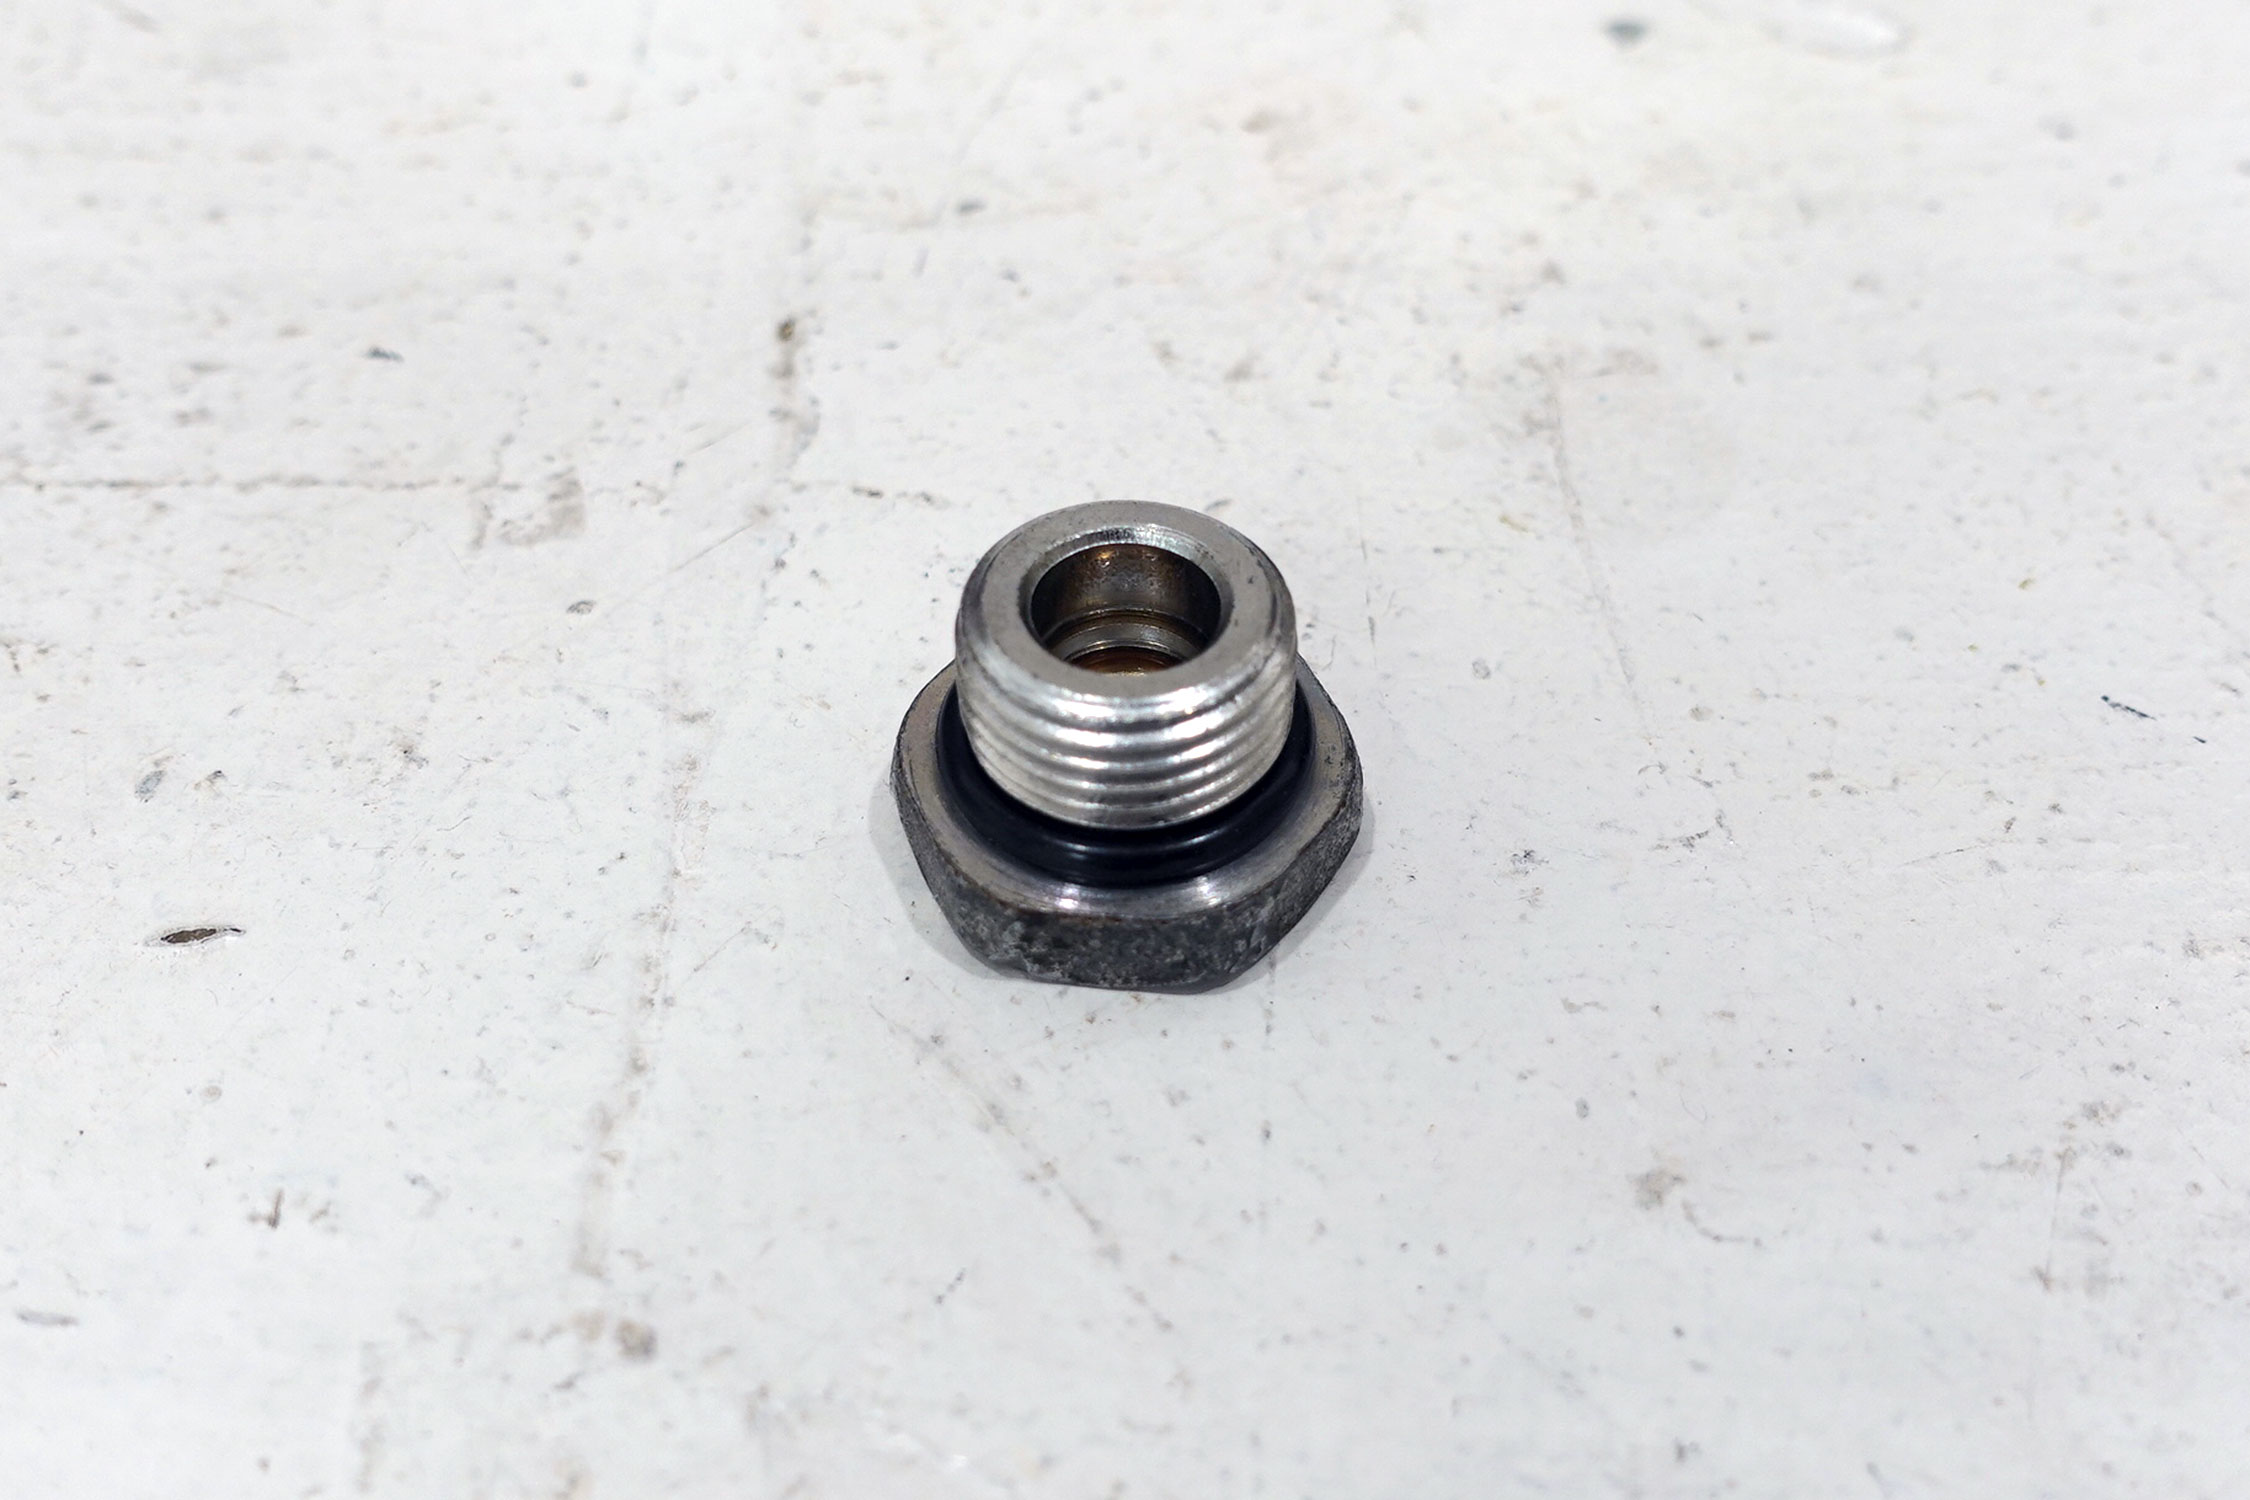
Transmission Fill Plug with Rubber O-Ring Gasket |
Next remove the overflow plug and then the drain plug. Let as much fluid drain out as possible.
I was able to get just over 3 quarts to drain out, just like the owners manual stated.
Install the drain plug with a new crush gasket with the flat side of the gasket facing the plug. Torque: 15 ft·lbf.

Factory Service and Repair Manual (FSM) Page
Transmission Components |
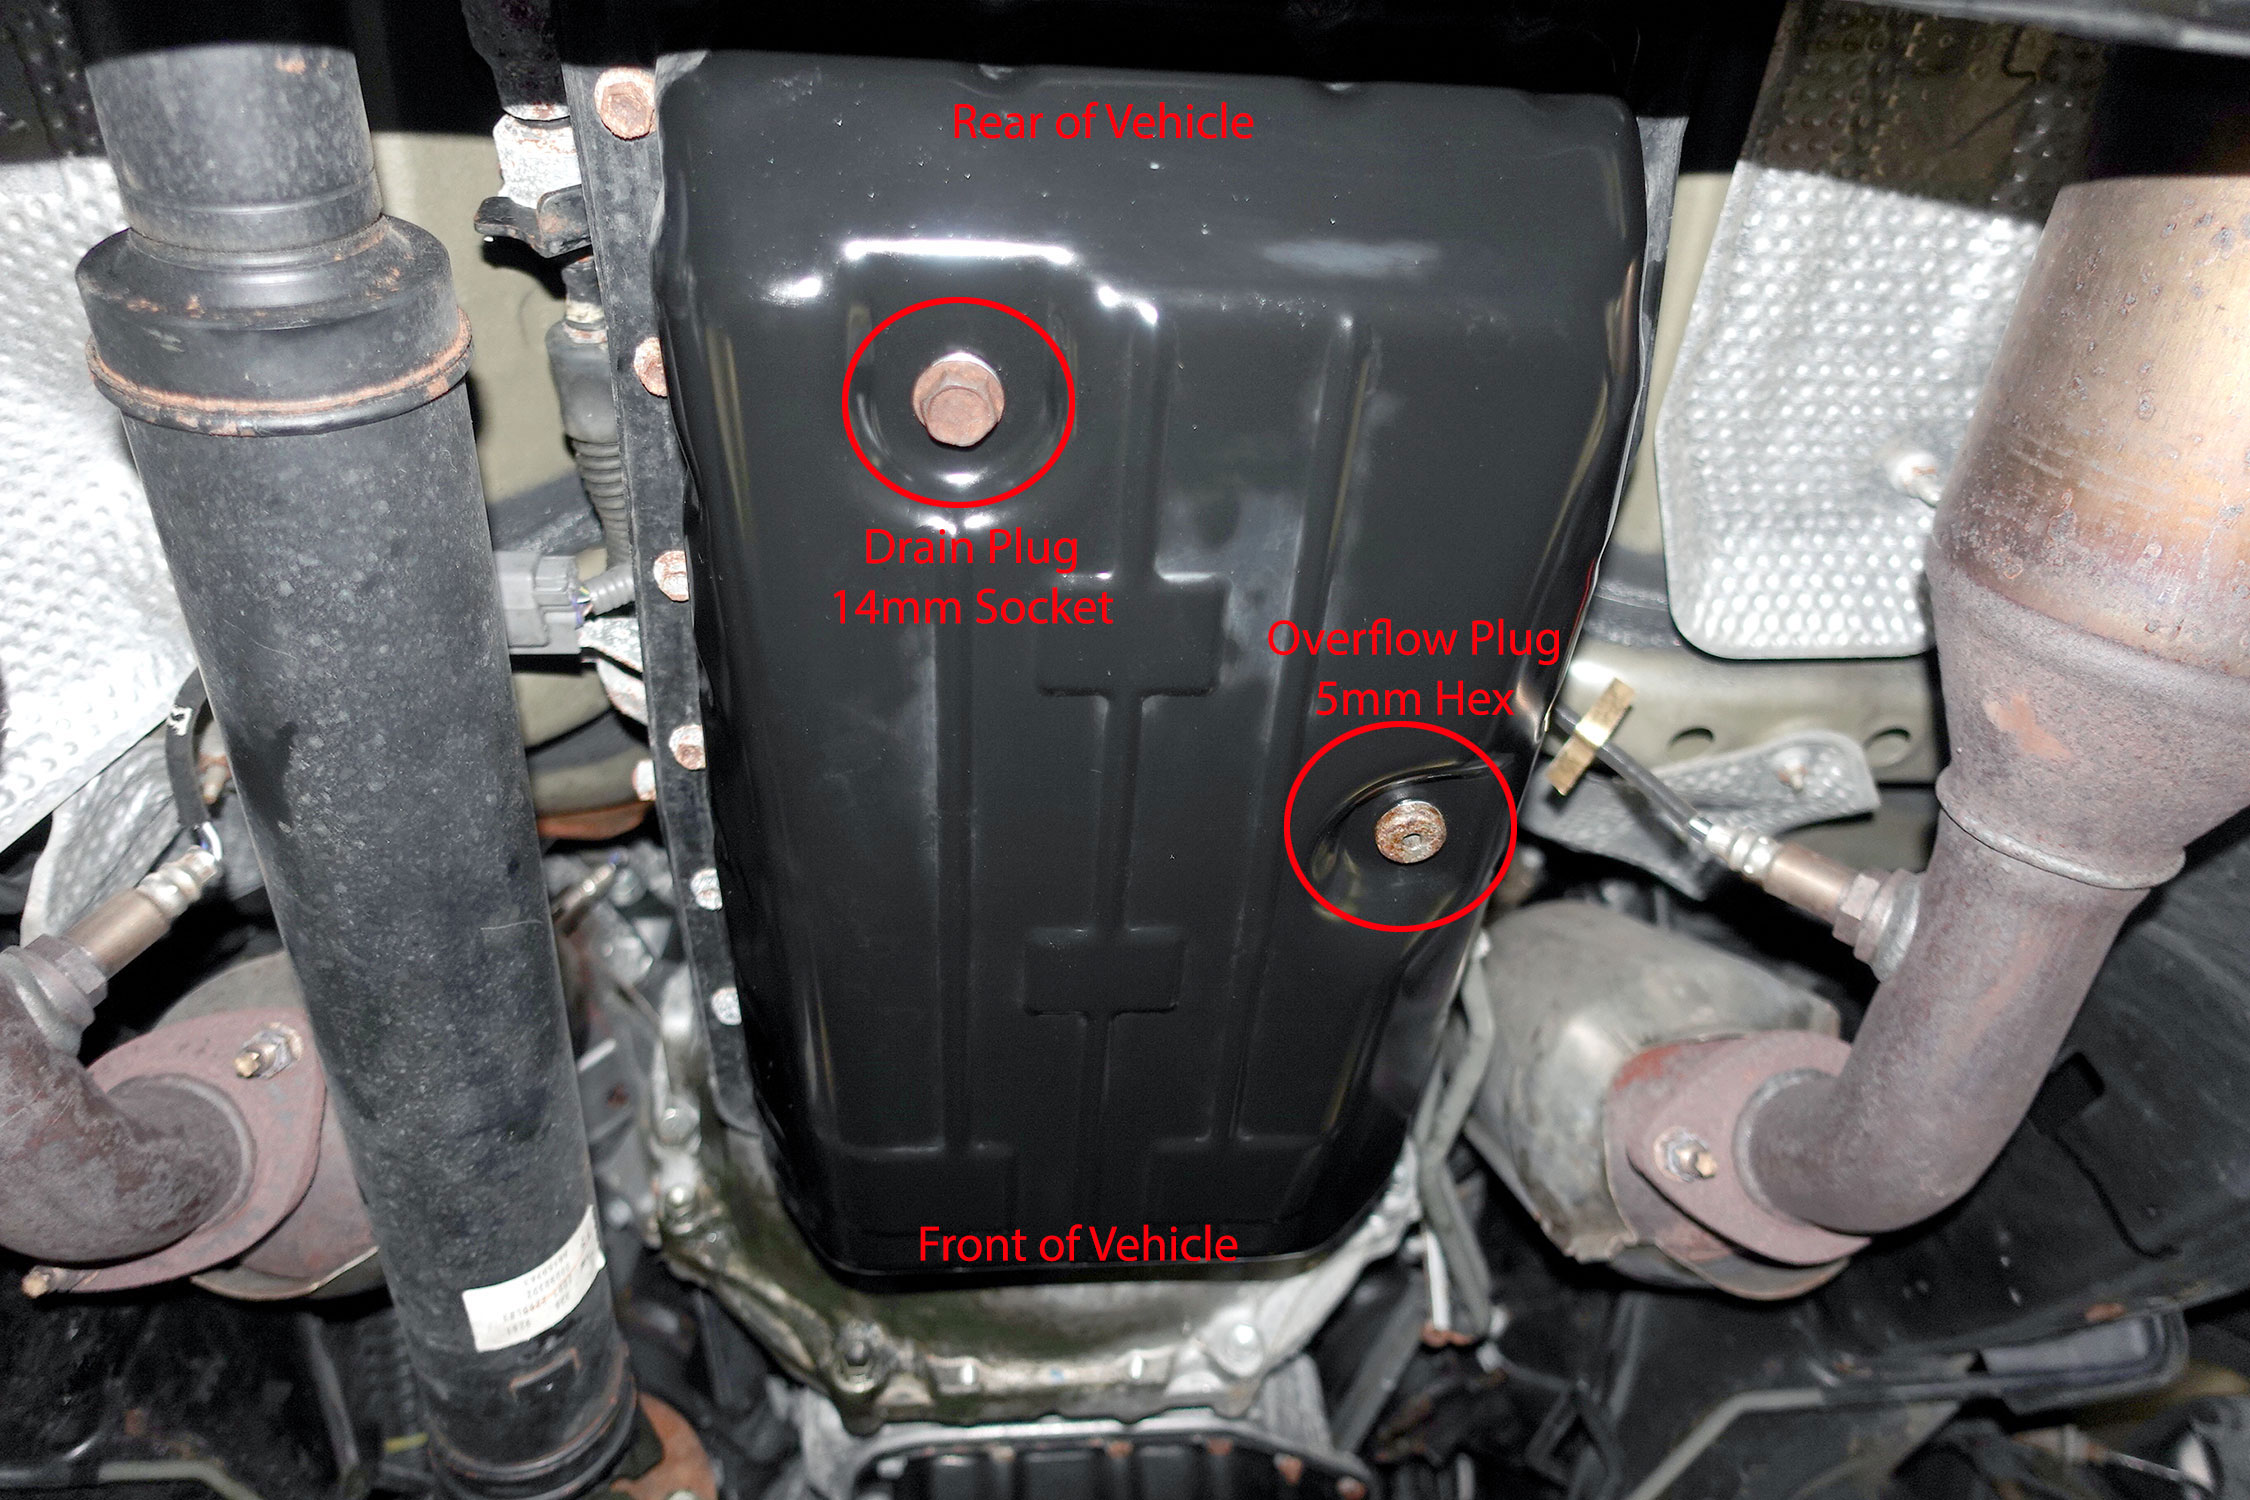
Transmission Drain Plug and Overflow Plug Location |
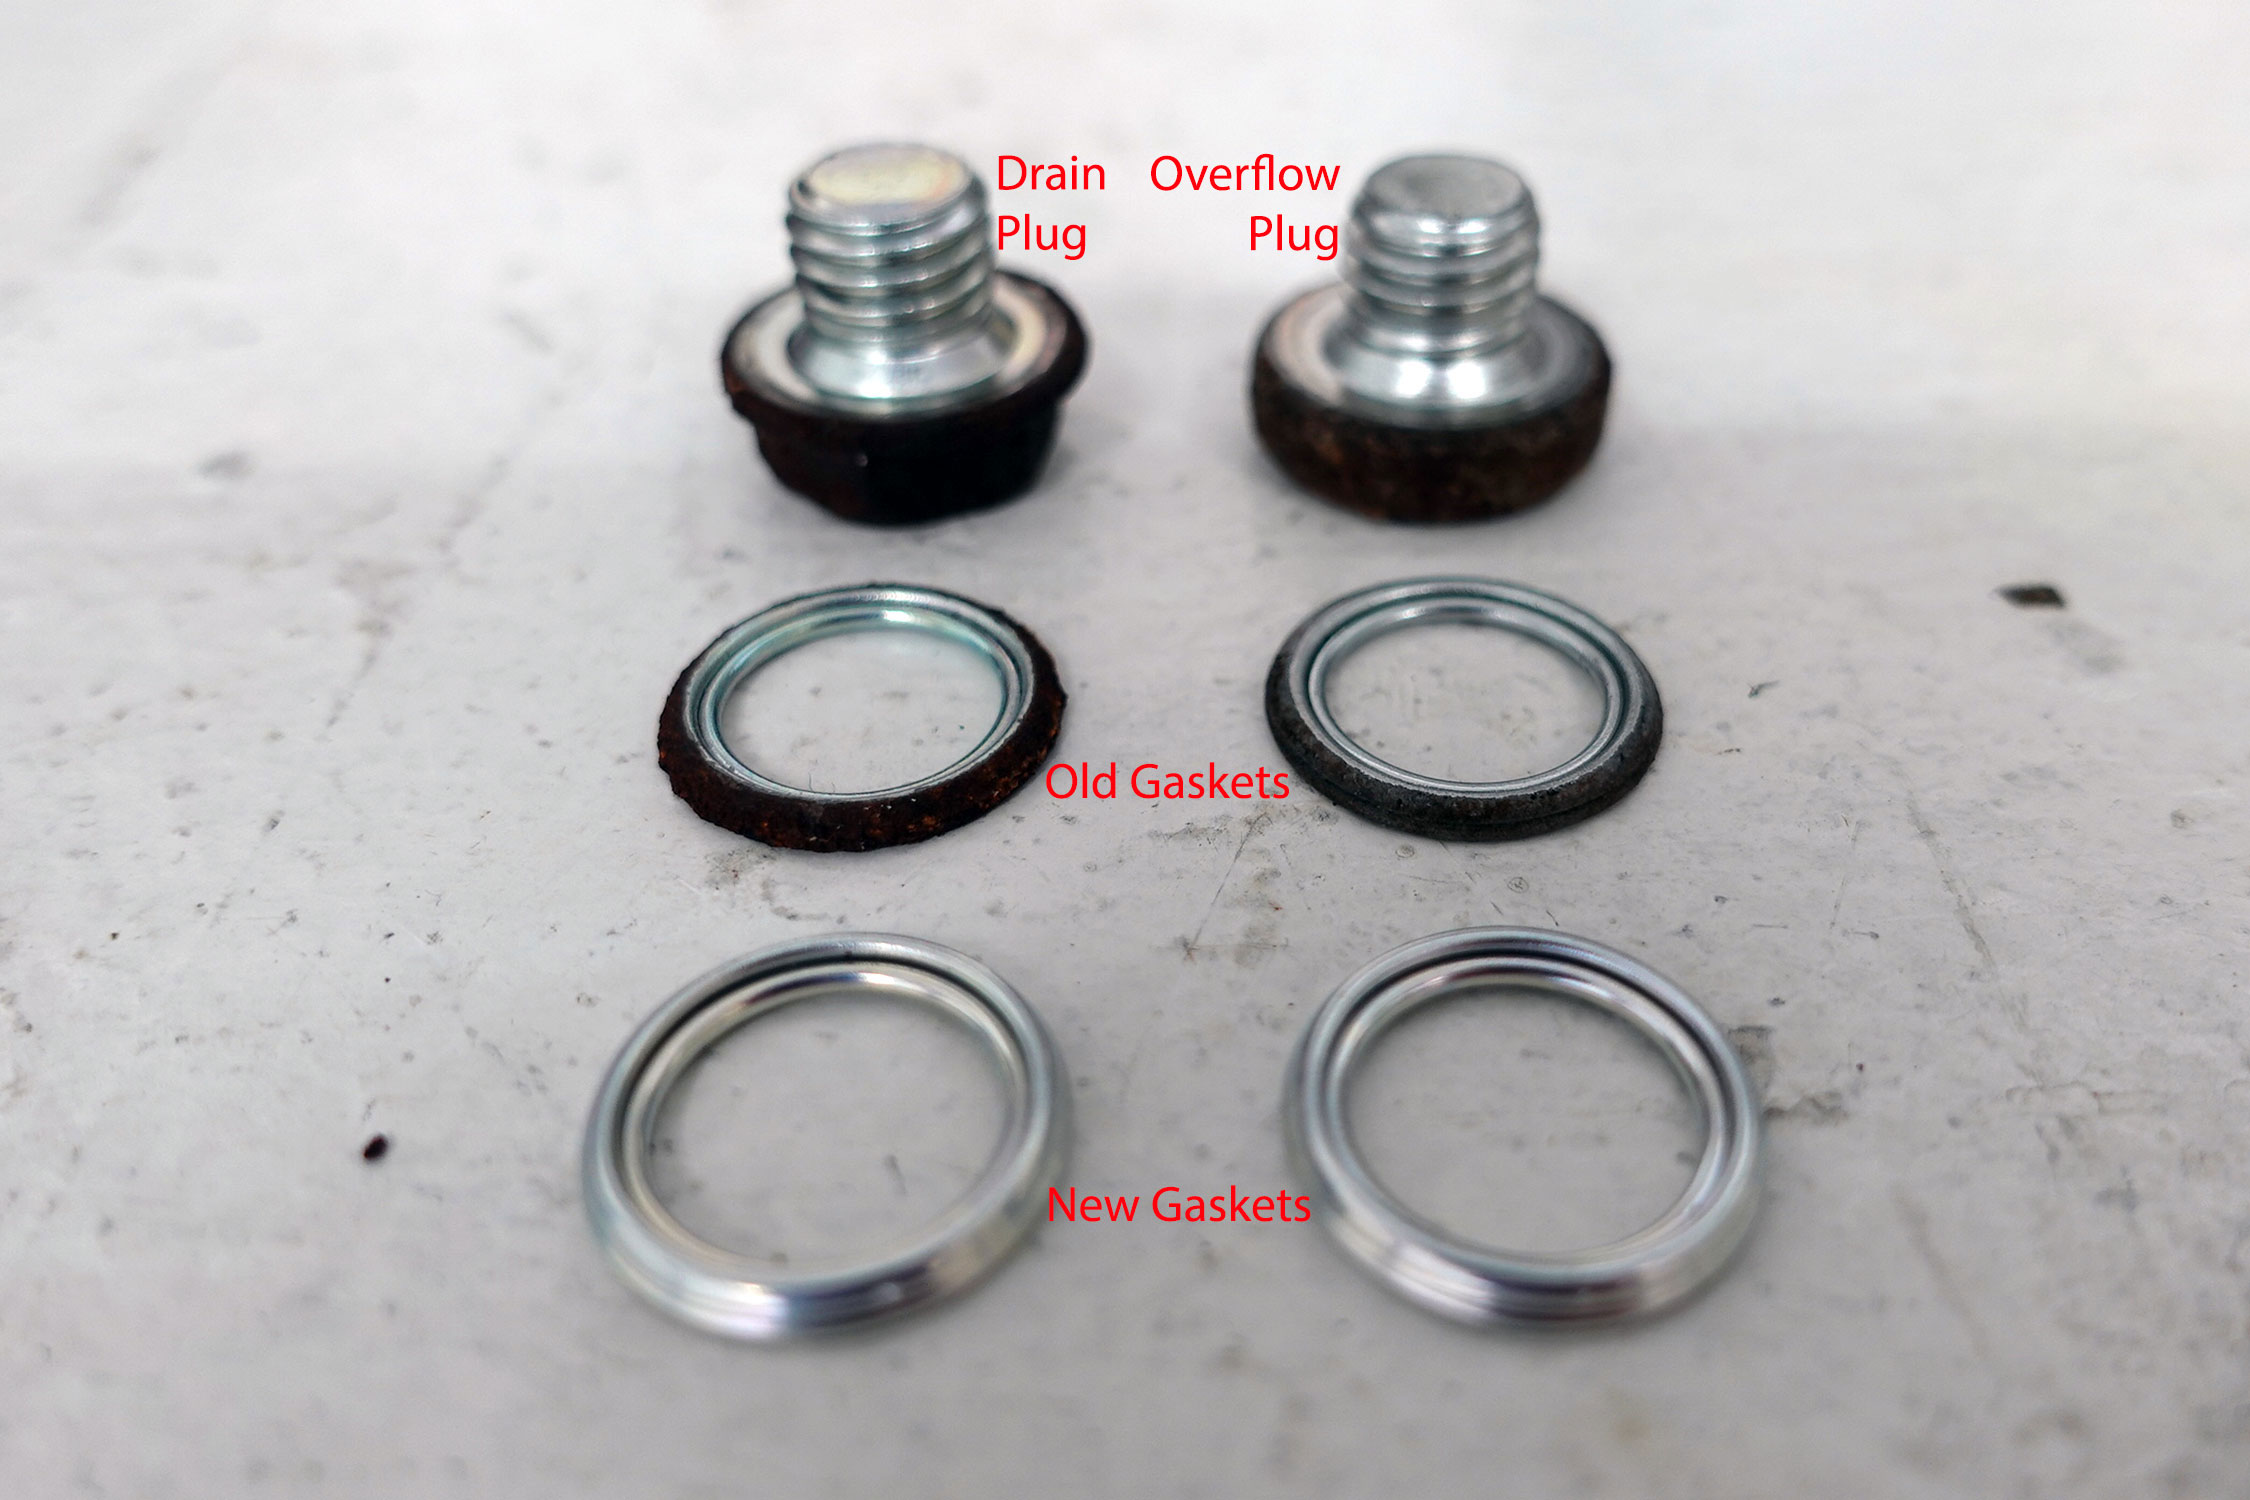
Transmission Drain Plug and Overflow Plug Gaskets 35178-30010 |
1. BEFORE FILLING TRANSMISSION
This transmission requires Toyota Genuine ATF WS.
It is necessary to refill the transmission with the correct amount of fluid.
The vehicle must remain level while adjusting the transmission fluid level.
On vehicles equipped with active suspension, turn the suspension control switch OFF if it is necessary to jack up the vehicle with the engine running.
2. TRANSMISSION PAN FILL
(a) Remove the refill plug and overflow plug.
(b) Fill the transmission through the refill hole until fluid begins to trickle out of the overflow tube. I used a Liquid Transfer Hand Pump to do this.
(c) Reinstall the overflow plug, use the old gasket for now as we will be removing this again later to set the fluid level and will
swap over to the new gasket at that time. Torque: 15 ft·lbf.
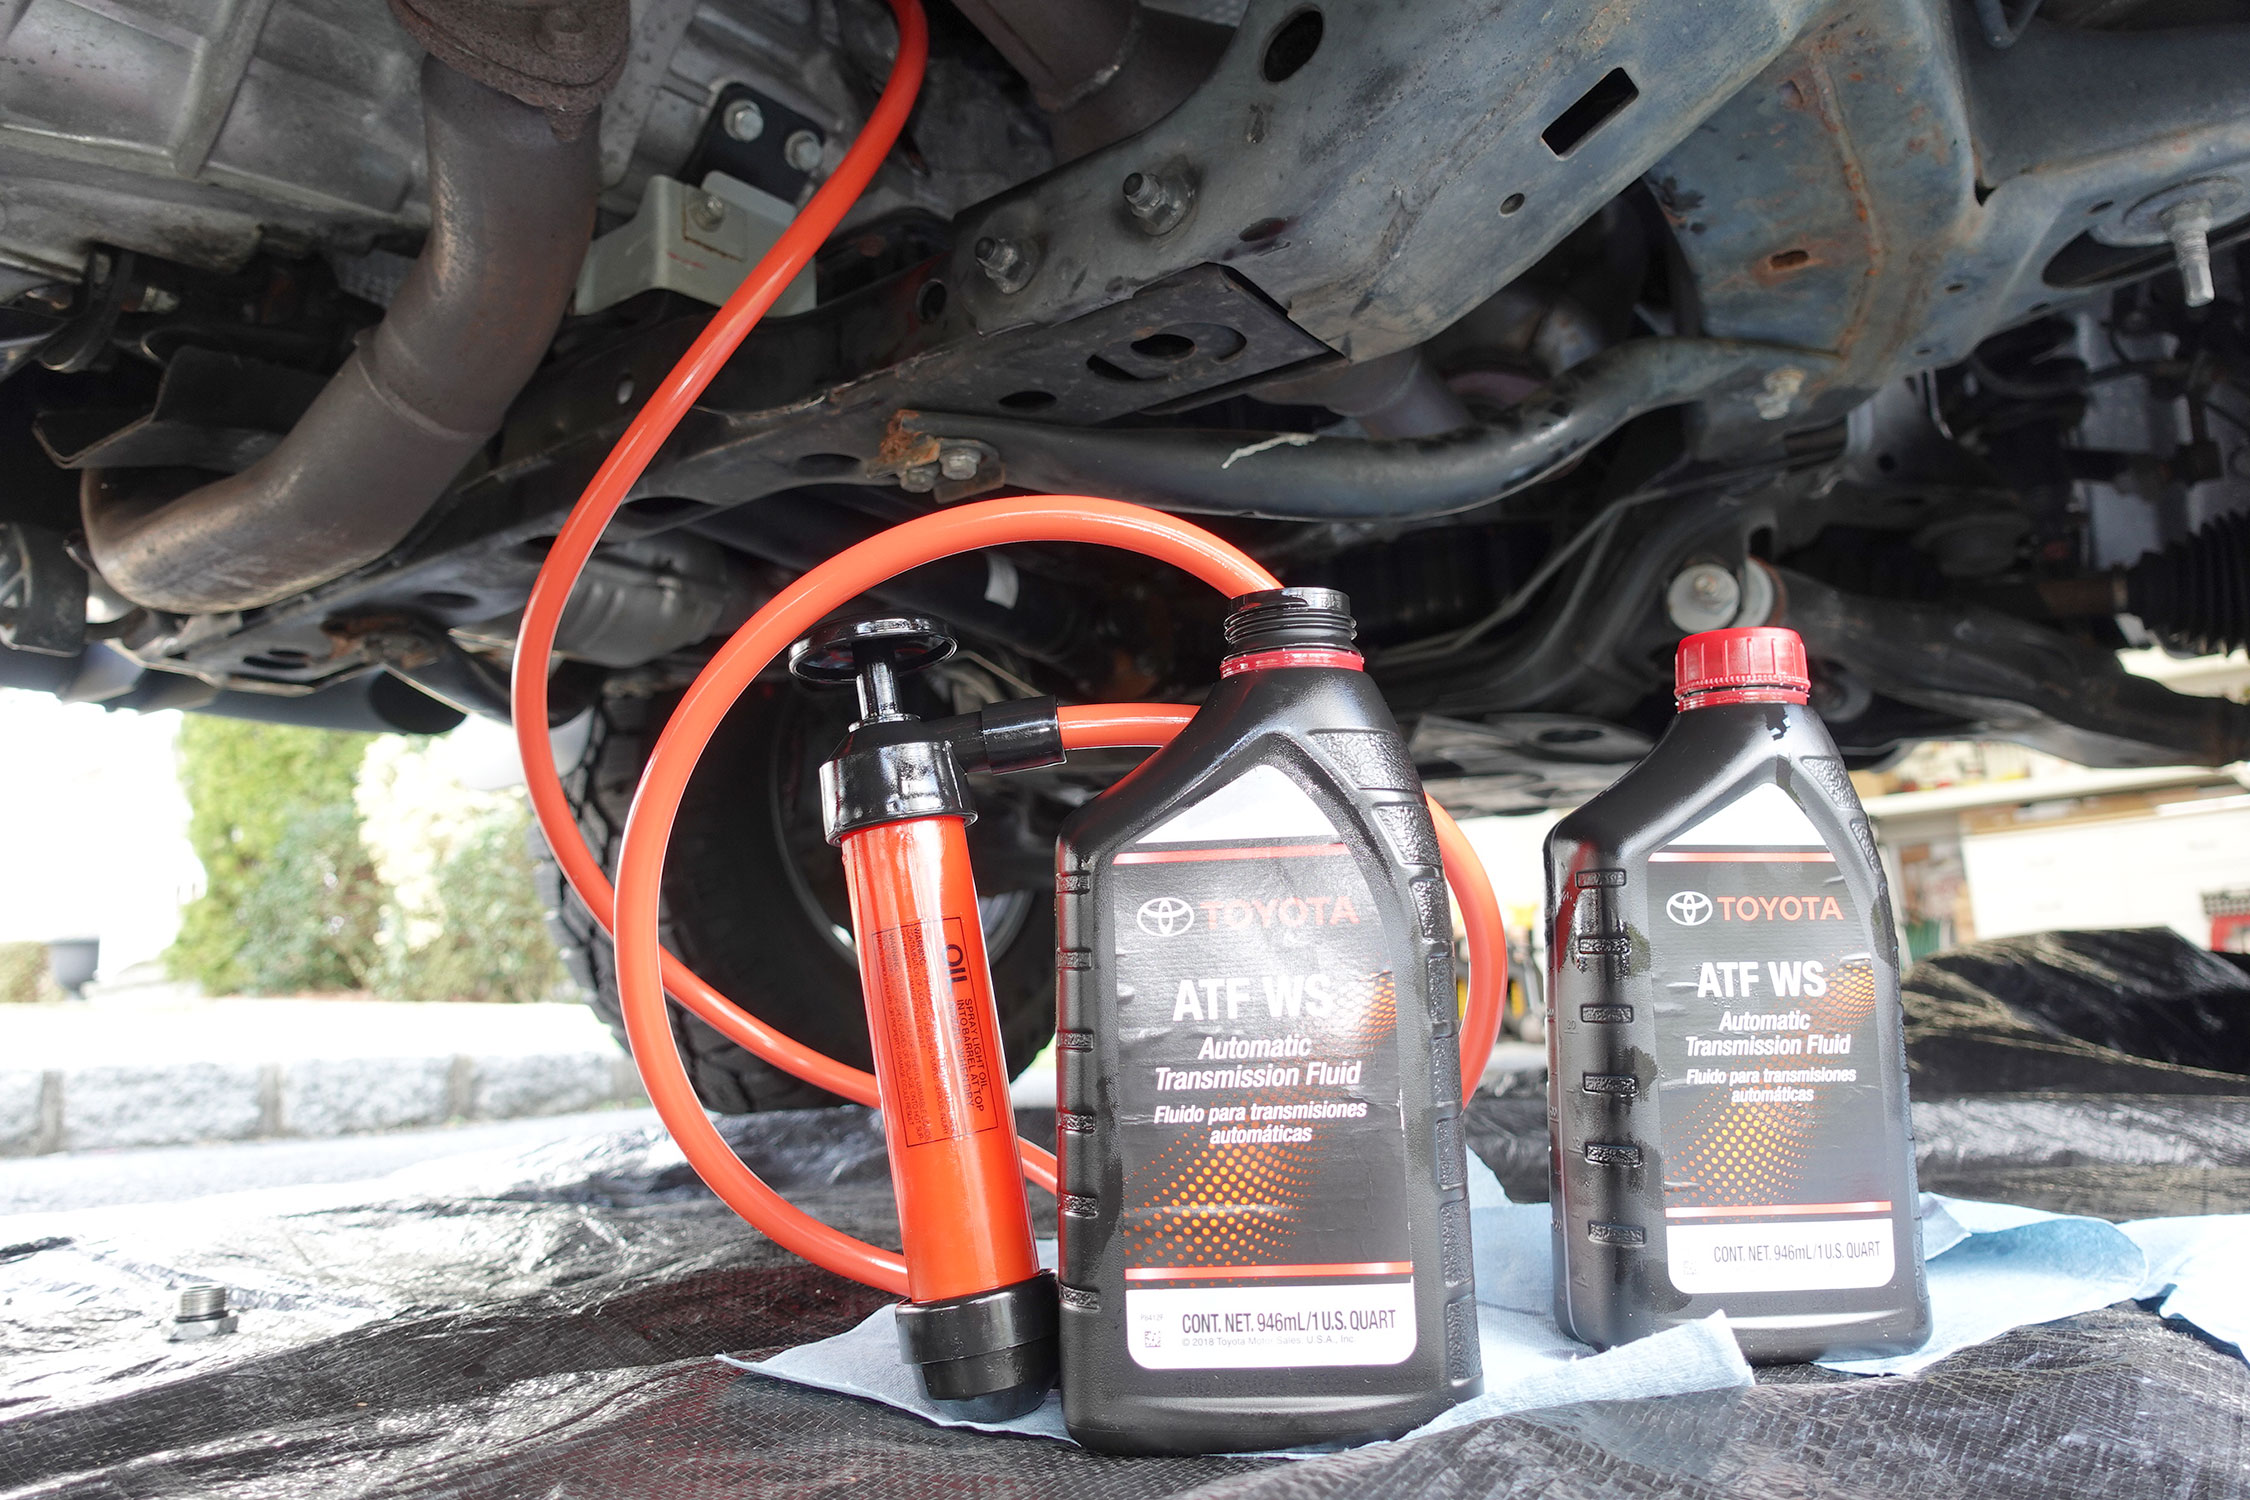
Transfer Pump to fill |
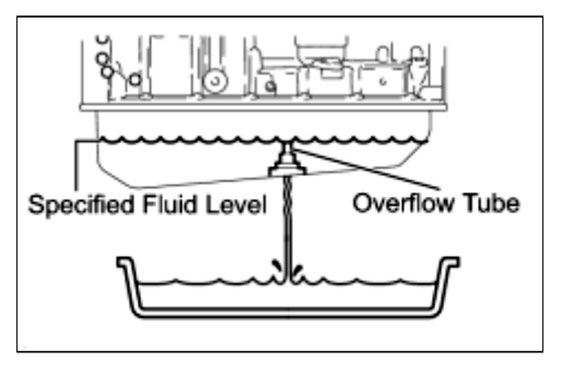
|
3. TRANSMISSION FILL
(a) Fill the transmission with the correct amount of fluid as listed below.
Transmission pan and drain plug removal 1.37 US qts. This is in addition to what you used to fill the pan. In total I used 4 quarts for the fill process.
(b) Reinstall the refill plug to avoid fluid splash.
HINT:
If you cannot add the listed amount of fluid, do the following:
Install the refill plug.
Allow the engine to idle with the air conditioning OFF.
Move the shift lever through entire gear range to circulate fluid.
Wait for 30 seconds with the engine idling.
Stop the engine.
Remove the refill plug and add fluid.
Reinstall the refill plug.
4. FLUID CIRCULATION
(a) Allow the engine to idle with the air conditioning OFF.
(b) Move the shift lever through entire gear range to circulate fluid.
5. FLUID TEMPERATURE CHECK
Check the fluid temperature using either step 5A (Toyota Recommended) or step 5B (Alternative Method).
5A. NOTICE: The fluid temperature should be less than 30°C (86°F) before beginning the fluid temperature check.
Process to check fluid temperature without intelligent tester (Using A/T OIL TEMP indicator).
(1) Connect terminals between CG (4) and TC (13) of the DLC3 using SST 09843-18040 Diagnostic Port Jumper Wire for OBD equipped vehicles.
(2) Move the shift lever back and forth between N and D quickly for six seconds.
(3) The A/T OIL TEMP indicator light on the combination meter will come on for two seconds. This indicates that the fluid temperature check mode has been started.
(4) Allow the engine to idle until the fluid temperature reaches a minimum of 97°F and a maximum of 115°F, as per TSB 0129-08 issued on July 9, 2008.
(5) The A/T OIL TEMP indicator light will come on again when the fluid temperature reaches 97°F and will blink when it exceeds 115°F.
5B. Use an Infrared Laser Temperature Gun to measure the fluid temperature via the outside of the transmission pan, somewhere towards the center of the bottom of the pan.
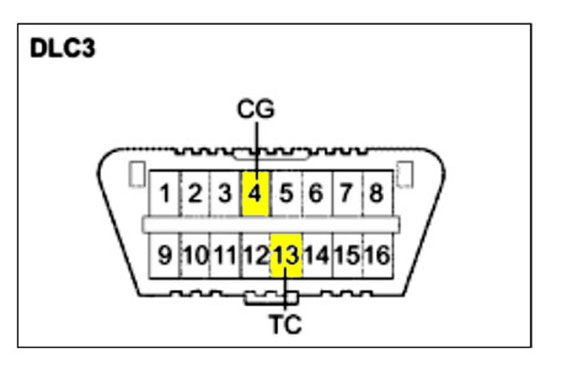
OBDII DLC3 Connector Port |
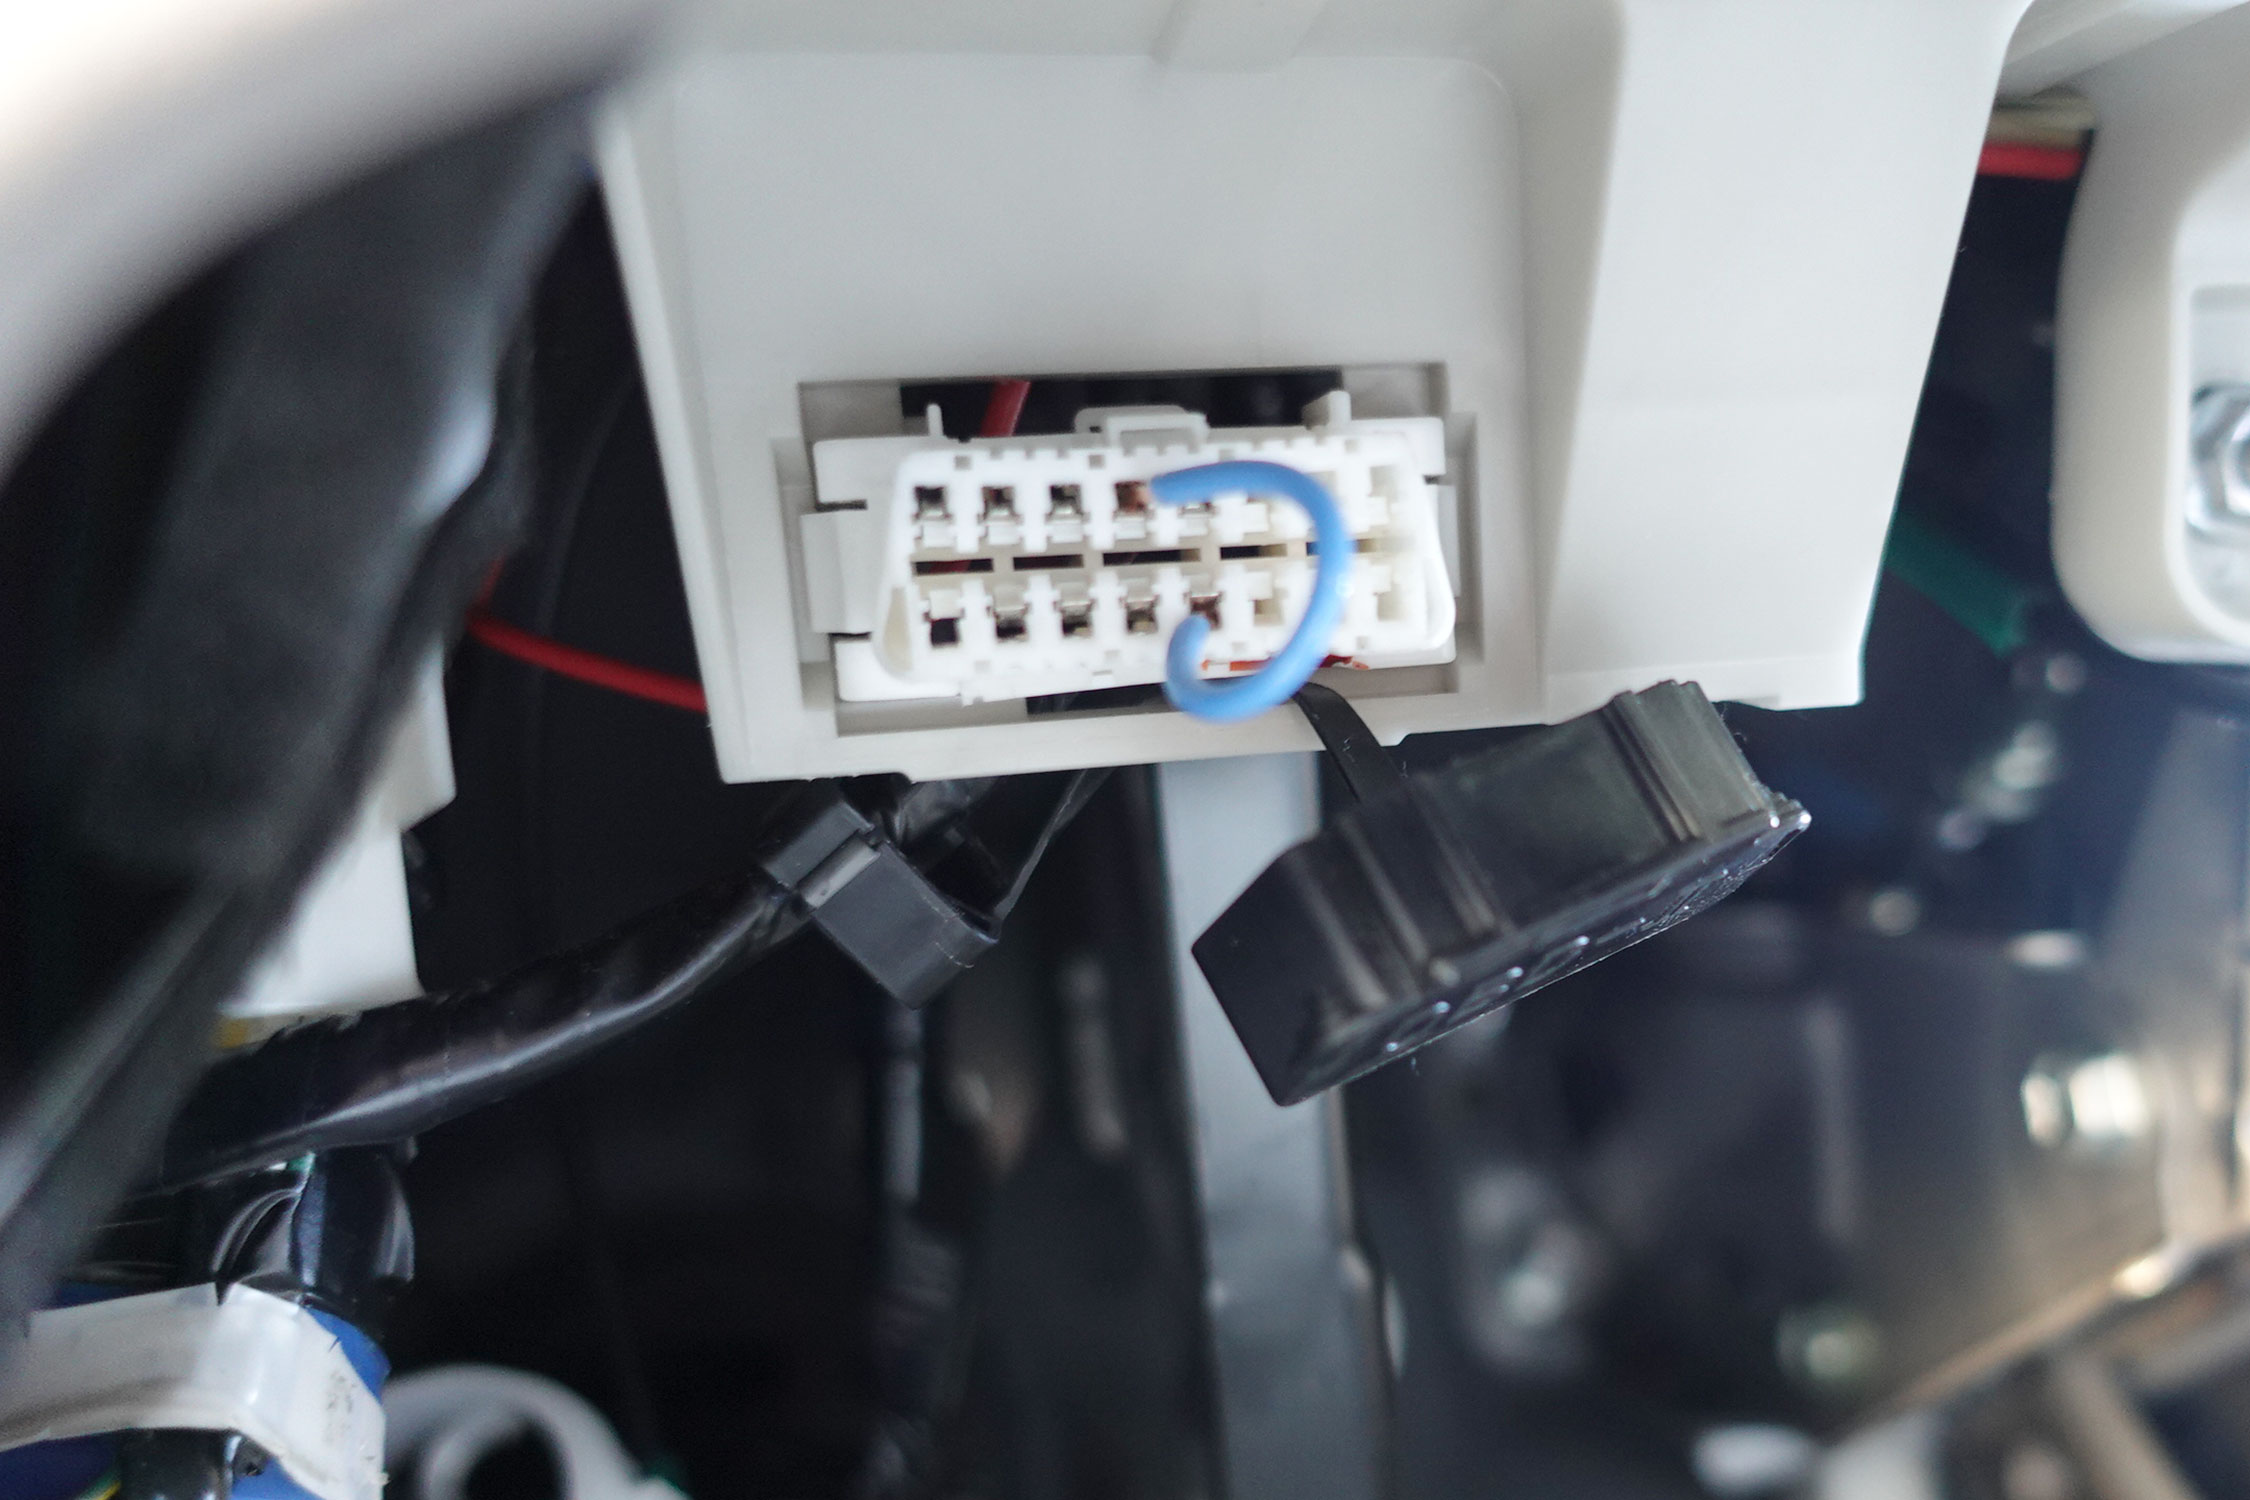
OBDII DLC3 Connector Port located under dash
with Jumper Wire installed |
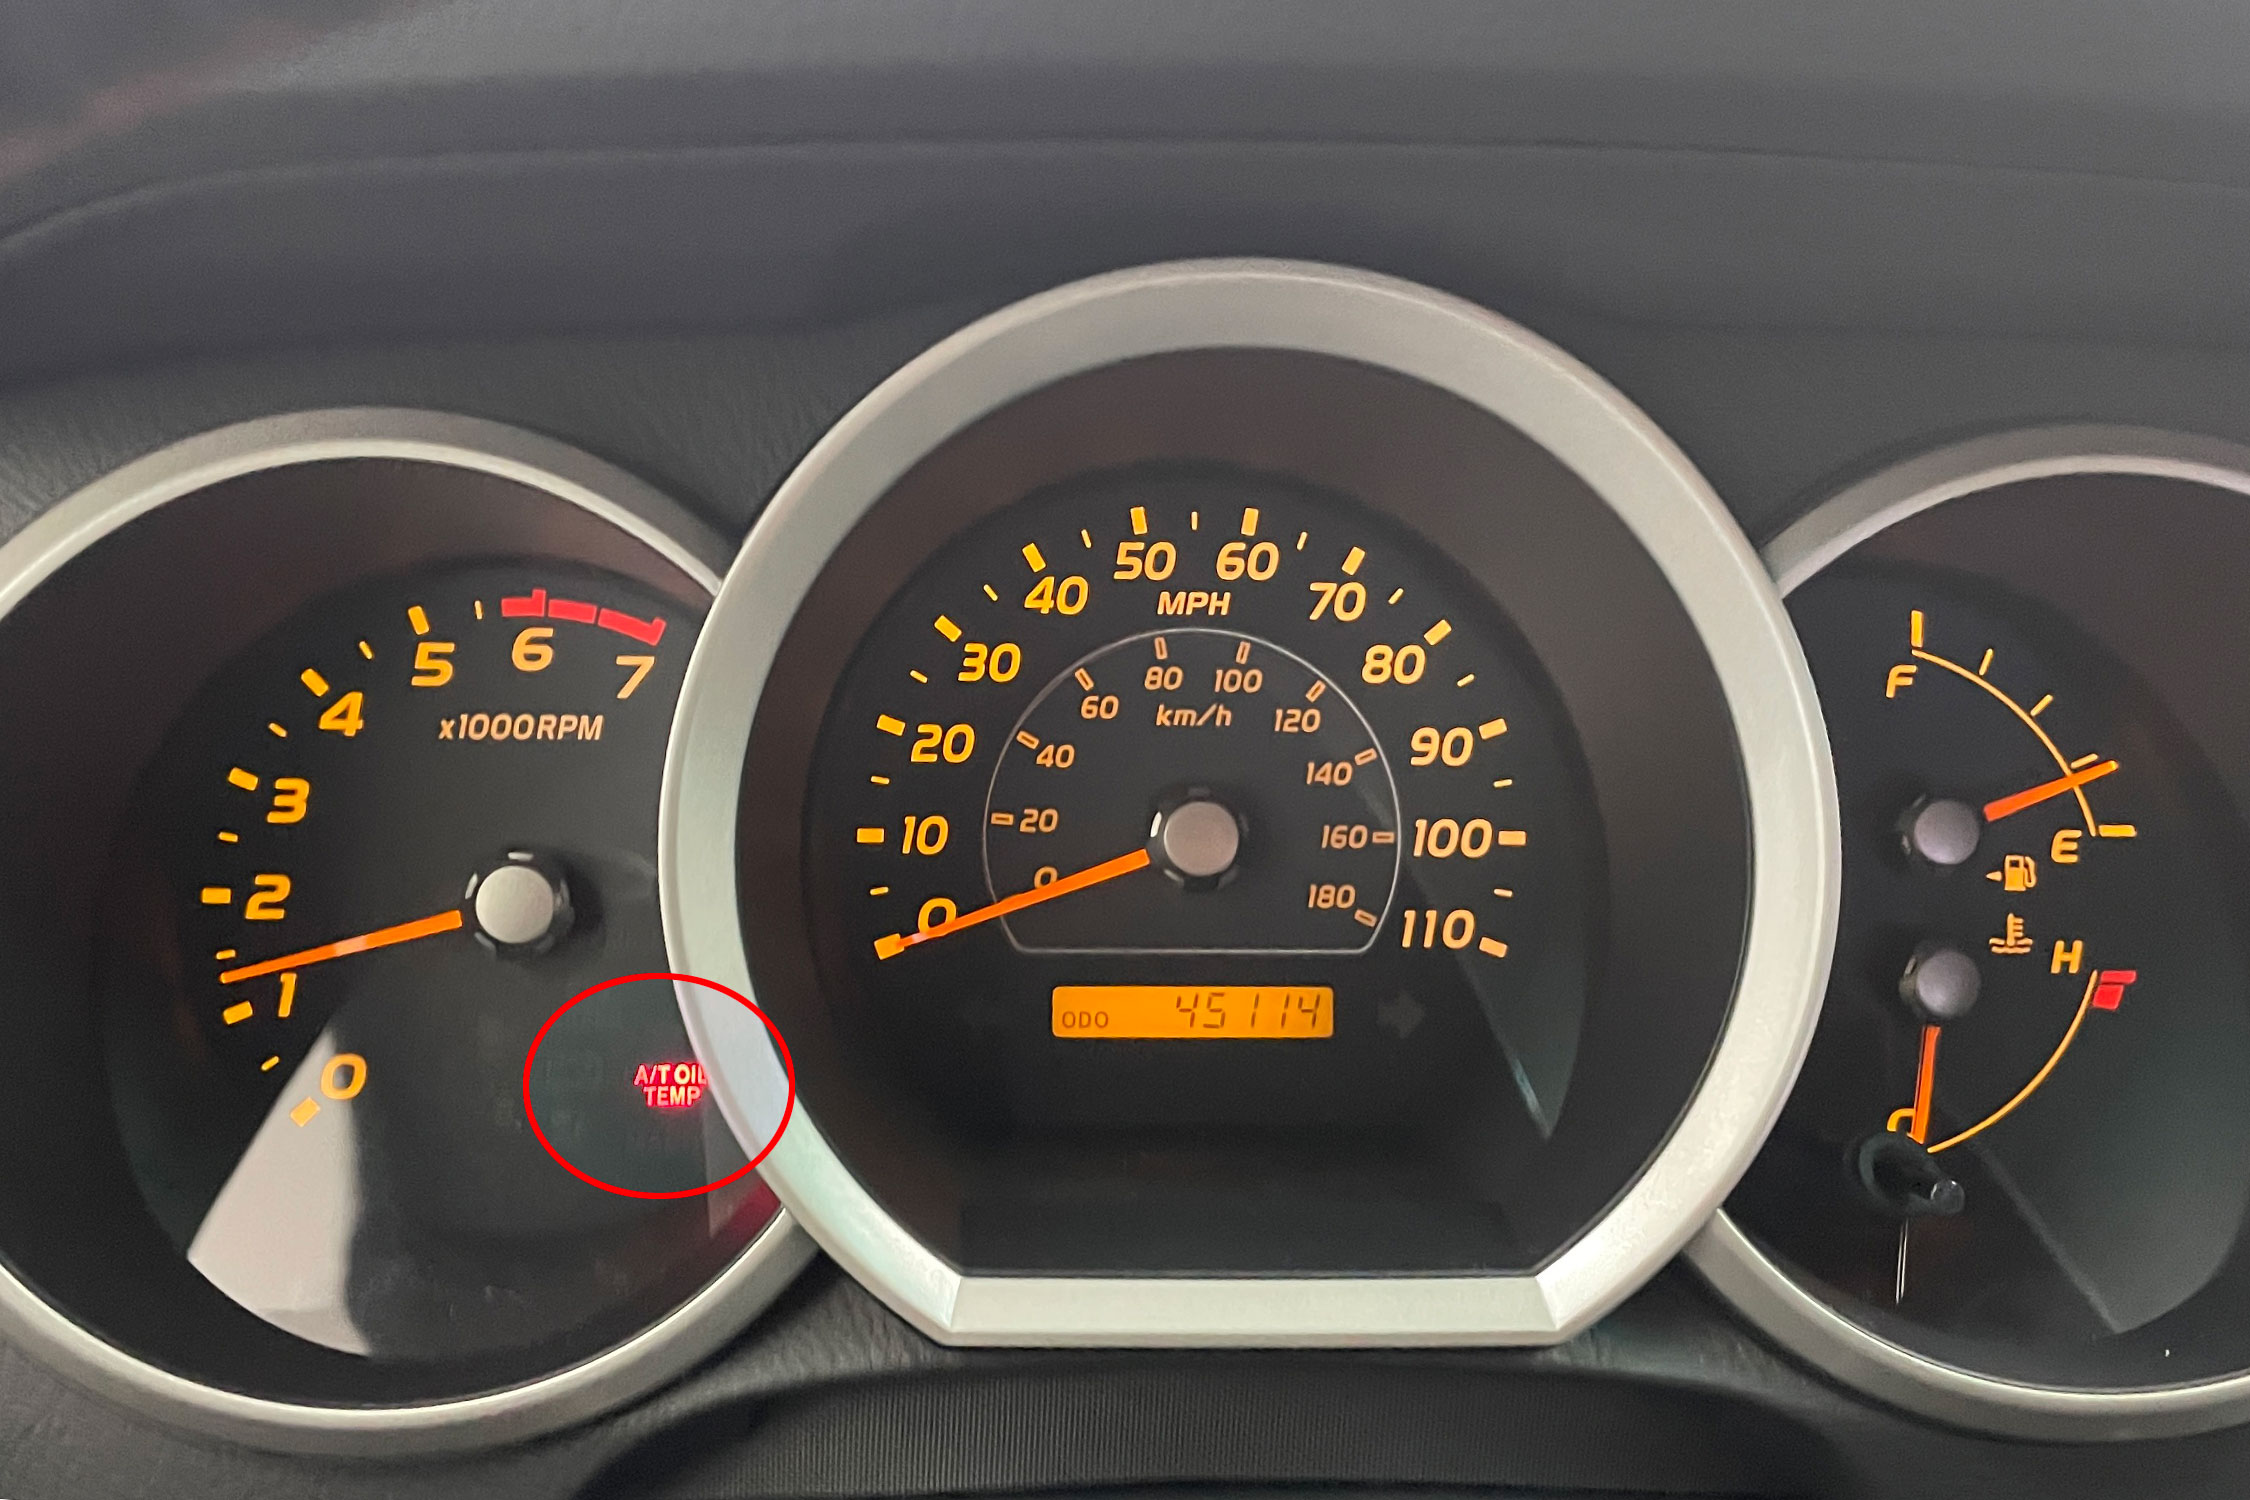
A/T OIL TEMP indicator light on the combination meter
indicates that the fluid temperature check mode has been started |
6. FLUID LEVEL CHECK
NOTICE: The fluid temperature must be between 97°F and 115°F to accurately check the fluid level.
(a) Remove the overflow plug with the engine idling.
(b) Check that the fluid comes out of the overflow tube.
If fluid does not come out, proceed to step 7.
If fluid comes out, wait until the overflow slows to a trickle and proceed to step 8.
7. TRANSMISSION REFILL
(a) Install the overflow plug.
(b) Stop the engine.
(c) Remove the refill plug.
(d) Add 0.4 liters (0.42 US qts, 0.35 Imp qts) of fluid.
(e) Allow the engine to idle and wait for 10 seconds.
(f) Proceed to step 6.
8. COMPLETE
(a) Install the overflow plug with a new crush gasket with the flat side of the gasket facing the plug. Torque: 15 ft·lbf.
(b) Stop the engine.
(c) Install the refill plug with a new gasket. Torque: 29 ft·lbf.
|


